QUERY_ RESULTS
Found 10 match(es) for "web design"
SCHEMATICS 10
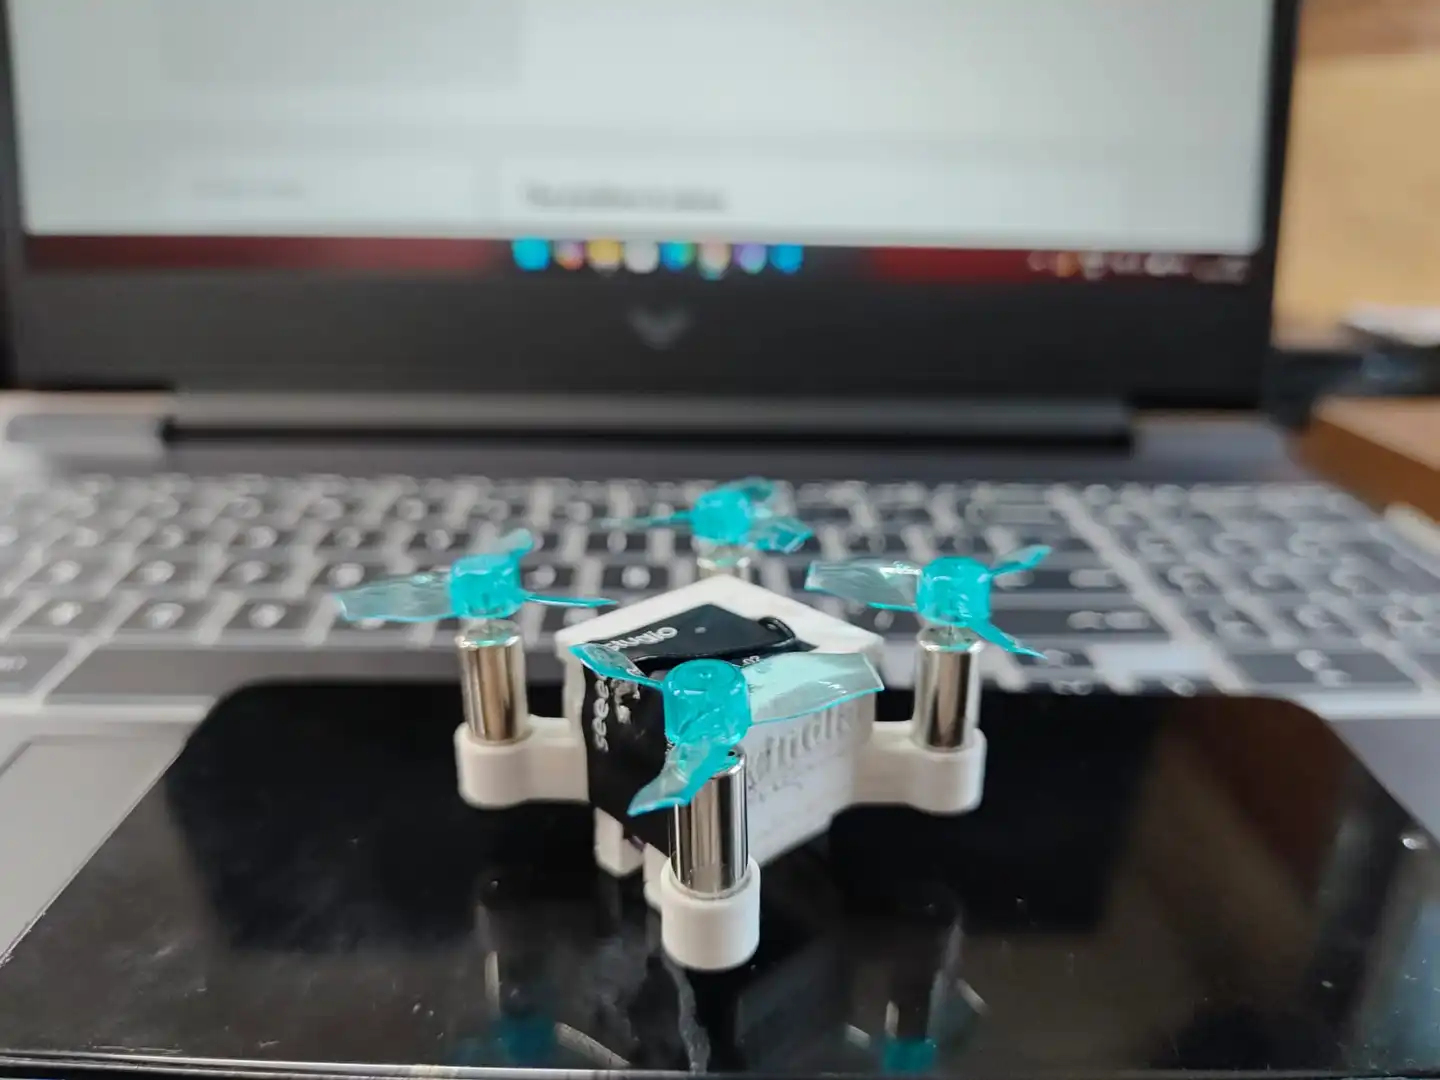
Fury Fly- India's Smallest Drone
Every engineering project starts with a small idea. Some ideas remain on paper, while others slowly become reality. Fury Fly is one of those ideas that I decided to turn into something real. Fury Fly is an ambitious project focused on building one of India's smallest custom-designed drones. The drone is still under development, and there's a long journey ahead before its first successful flight. Instead of waiting until everything is finished, I wanted to share the complete development process—the good moments, the failures, and everything in between. When I first planned Fury Fly, I thought making a tiny drone would actually be easier than building a larger one. I couldn't have been more wrong. The smaller the drone becomes, the harder every decision gets. Space becomes extremely limited, weight becomes critical, and even a few extra grams can affect flight performance. Every wire, screw, connector, and electronic component has to be carefully selected. I've spent countless hours researching motors, batteries, flight controllers, ESCs, receivers, and propellers. Most of my time wasn't spent building—it was spent learning. One of the biggest challenges has been designing a frame that is both lightweight and strong enough to survive crashes. Every redesign teaches me something new about engineering and manufacturing. Like every student project, things haven't always gone according to plan. Components arrived late, some parts were incompatible, and a few designs looked perfect on the computer but failed in real life. Although frustrating at first, these setbacks have become some of the best learning experiences. For me, Fury Fly is much more than just another drone project. It's helping me understand embedded systems, PCB layouts, aerodynamics, battery management, wireless communication, 3D design, firmware configuration, and mechanical design—all in one project. I'm documenting the entire process so other students can learn from both my successes and my mistakes. Planned Specifications Note: These specifications are the current design targets and may change as development continues. Specification Planned Value Project Name Fury Fly Category Nano Drone Country India Status Under Development Drone Type Custom Built Flight Controller ESP S3 XIAO Frame Material Carbon Fiber / 3D Printed Prototype Propeller Size 31–40 mm (Estimated) Motor Type Coreless / Brushless (Under Testing) Battery 1S Li-Po Estimated Flight Time 4–7 Minutes Control Range 50–100 m (Target) Camera No (Initial Prototype) Weight Goal Under 30 g Assembly DIY Planned Components Component Purpose Flight Controller Controls drone stability Motors Generate lift Propellers Produce thrust Li-Po Battery Power supply Receiver Wireless communication Frame Holds all components Charger Battery charging Transmitter Manual control Screws & Mounts Assembly Connectors & Wiring Electrical connection Estimated Budget Item Estimated Cost (₹) Flight Controller 1,100 Motors (4x) 900 Propellers 150 Li-Po Battery 500 Receiver 800 Radio Transmitter 4,000 Frame Material 700 Charger 700 Connectors & Wires 250 Miscellaneous 1,200 Estimated Total ₹10,300 What I've Learned So Far One thing I've learned during this project is that engineering isn't just about assembling parts together. It's about solving problems that you never expected to face. Sometimes you spend hours trying to fix something that turns out to be a loose connector. Sometimes an entire design has to be changed because one component is just a few millimeters too large. Those moments can be frustrating, but they're also where most of the learning happens. Every redesign makes the project better. Every mistake teaches something new. And every small milestone makes the final goal feel a little closer. What's Next? The next phase of Fury Fly focuses on completing the frame design, integrating all electronic components, configuring the flight controller, and preparing for the first flight tests. There will almost certainly be crashes, broken propellers, firmware issues, and several redesigns before the drone flies the way I imagine. But that's exactly what makes building something from scratch so rewarding. This isn't just about creating a tiny drone. It's about learning, improving, and showing that student projects can become something meaningful with enough patience and dedication. Thank you to everyone following the Fury Fly journey. More updates, testing videos, design improvements, and development logs will be shared as the project continues to evolve. The first flight may still be ahead—but every small step is bringing Fury Fly closer to the sky.
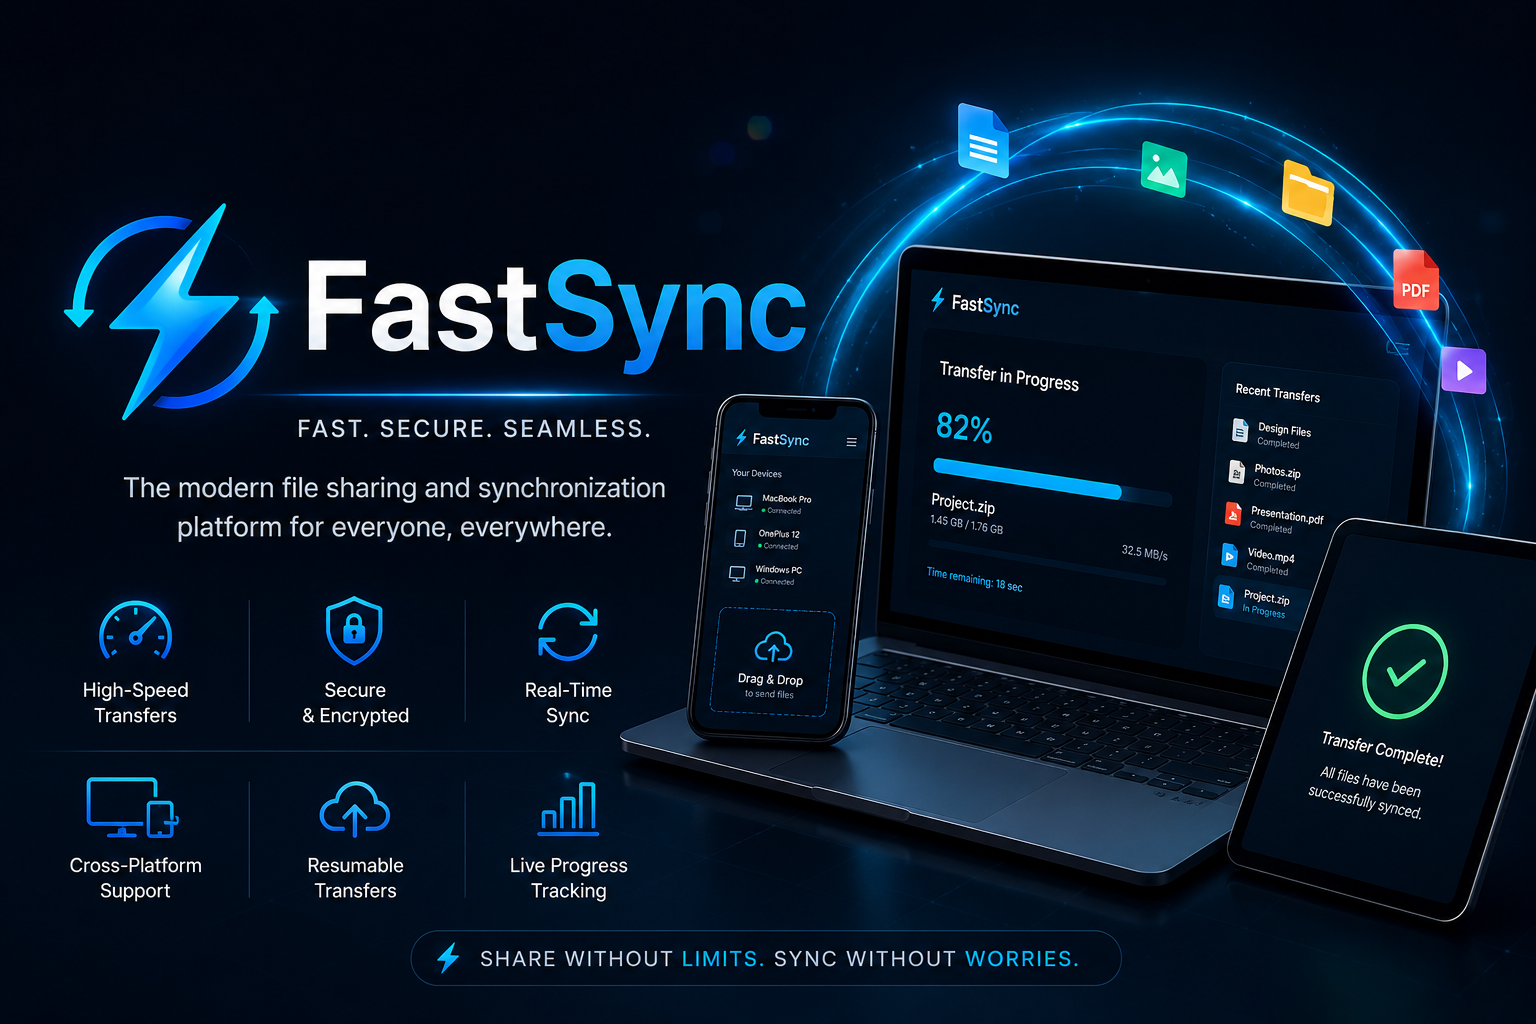
FastSync – Secure Real-Time File Sharing & Synchronization
FastSync is a modern, cross-platform file sharing and synchronization platform designed to make transferring files between devices fast, secure, and effortless. Whether you're sharing documents, images, videos, or large project files, FastSync eliminates the need for complicated setup or third-party storage by enabling seamless, high-speed transfers over a local network or the internet. The idea behind FastSync came from the frustration of using slow, ad-filled file-sharing services and the hassle of connecting multiple devices manually. We wanted to build a lightweight solution that prioritizes speed, privacy, and user experience while remaining accessible to everyone. The platform features real-time file synchronization, drag-and-drop uploads, secure encrypted transfers, progress tracking, resumable downloads, and cross-device compatibility. It is designed with a clean, intuitive interface so users can share files in just a few clicks without sacrificing security. Throughout the development process, we focused on optimizing transfer performance, ensuring reliable connections, and implementing secure authentication to protect user data. Building FastSync taught us valuable lessons about networking, real-time communication, file streaming, scalability, and creating responsive user experiences. FastSync demonstrates how modern web technologies can simplify file sharing while maintaining speed, security, and reliability, making it an ideal solution for students, professionals, teams, and anyone who frequently transfers files across devices. Key Features ⚡ High-speed file transfers 🔒 Secure encrypted file sharing 📂 Drag-and-drop file uploads 🔄 Real-time synchronization 📱 Cross-platform compatibility 📊 Live transfer progress tracking ⏸️ Resumable uploads and downloads 🎨 Clean and responsive user interface
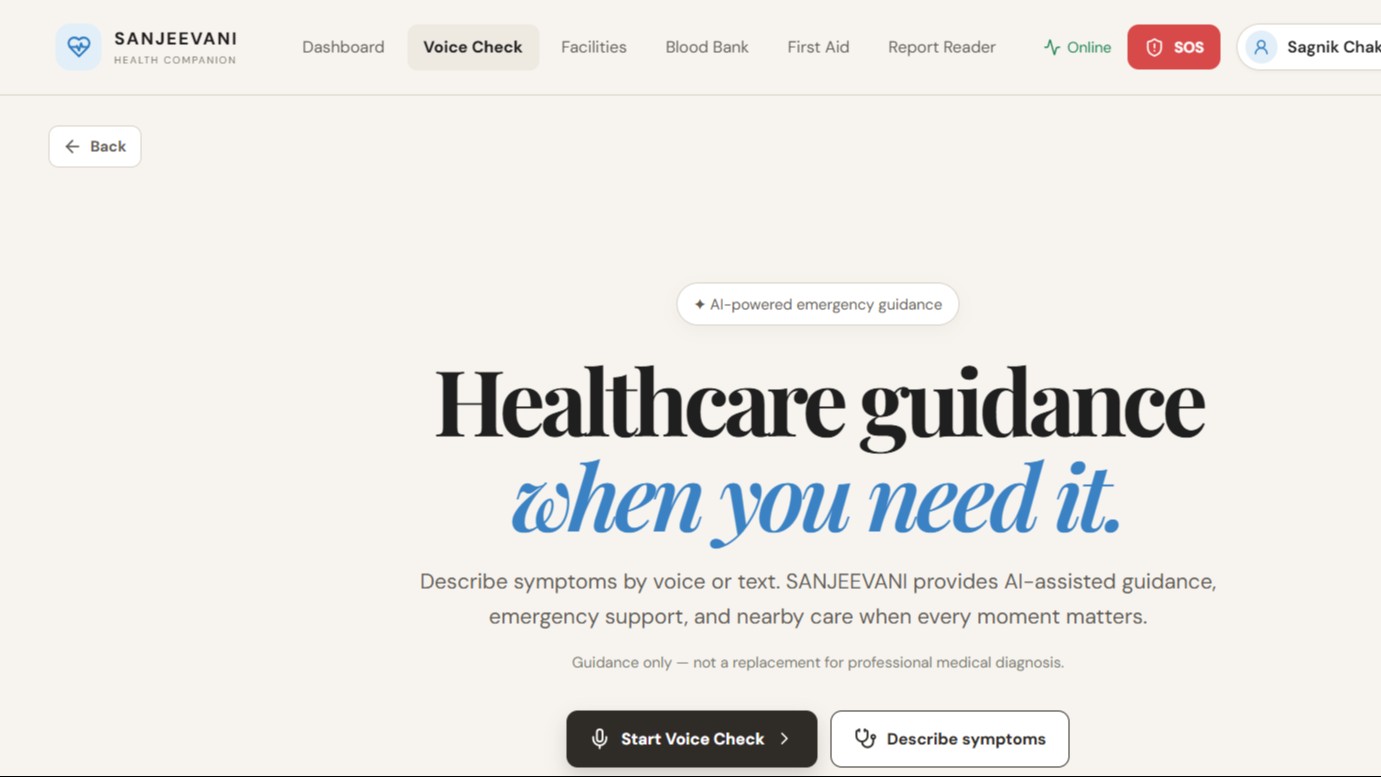
Sanjeevani healthcare guidance system
Project Name: Sanjeevani | Personal Health Companion Tagline: Bridging the gap between complex medical data and proactive, everyday health management. The Problem Navigating personal healthcare is notoriously overwhelming. Patients are routinely handed lab reports filled with indecipherable medical jargon, family health histories are scattered across paper files, and understanding minor symptoms often leads to internet-induced anxiety. The healthcare system is largely reactive. We realized there is a massive gap for a proactive, centralized platform that empowers individuals to understand, organize, and manage their daily health and wellness before acute issues arise. The Solution Sanjeevani is a comprehensive, AI-driven health management platform designed for the everyday user. We stripped away the clinical complexity to create a friendly, intuitive companion that helps users decode their medical data, track ongoing wellness, and manage their family’s health ecosystem in one secure place. It is not about reacting to crises; it is about building medical literacy and maintaining continuous well-being. Core Features AI Report Simplifier: A powerful OCR-driven tool that allows users to upload complex lab reports, prescriptions, or medical scans. Using AI, it translates dense medical jargon into clear, easily digestible summaries, ensuring patients actually understand their own health data. Voice-Powered Health Assistant: A hands-free, multilingual (English, Hindi, Bangla) symptom checker. Instead of doom-scrolling medical wikis, users can speak naturally about how they feel to receive calm, AI-assisted guidance on routine care and the next best steps. Continuous Health Tracker: A digital medical diary where users can log daily health events, monitor chronic conditions, and manage medication schedules. Care Circle & Health Profile QR: A centralized hub to keep track of family medical histories. Users can securely consolidate their data and generate a unified Health Profile QR code, making it incredibly easy to share accurate medical backgrounds during routine checkups or when visiting a new specialist. Healthcare Resource Locator: An integrated, real-time map mapping system to locate nearby clinics, specialized healthcare facilities, and blood banks for planned medical needs. Technical Architecture Frontend: React.js (Vite), Tailwind CSS for a highly accessible, responsive UI. Backend: Node.js, Express. Database & Authentication: Supabase for secure, scalable user management and data persistence. AI Integration: A custom AI Dispatcher routing tasks between Gemini (for deep contextual reasoning like Report Simplification) and Groq (for ultra-low latency voice processing). Real-Time Data: WebSockets powering live facility and resource updates.
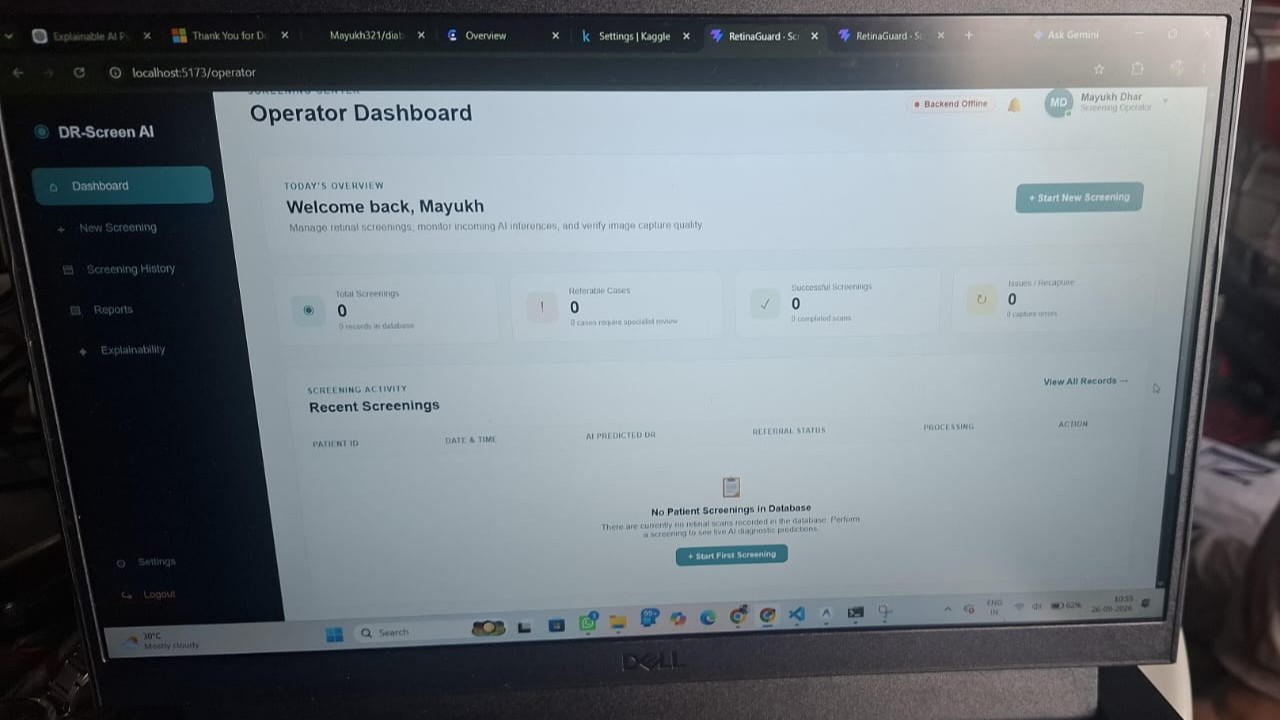
Diabetic Retinopathy Screening
# Problem Statement — RetinaGuard ## 1. The Problem Diabetic retinopathy (DR) is a diabetes-related eye disease that can progressively damage the retina and lead to vision loss when it is not identified and managed in time. Screening relies on examination of retinal fundus photographs, but screening programs can face practical challenges such as the large number of images that need to be reviewed, limited access to ophthalmologists, and the time required for manual assessment. A screening workflow therefore needs to answer three related questions: 1. **Can a retinal image be screened consistently for signs of diabetic retinopathy?**2. **Can potentially referable cases be identified and prioritized for specialist review?**3. **Can the AI result be presented in a workflow where a qualified clinician can review and certify the final report?** RetinaGuard is designed as a software solution around this screening workflow. --- ## 2. What RetinaGuard Solves RetinaGuard provides an end-to-end workspace for **AI-assisted diabetic retinopathy screening from retinal fundus photographs**. The system allows a screening operator to: - Register a patient and screening record.- Upload a retinal fundus photograph.- Store the uploaded image using cloud image storage.- Run an ONNX-based machine-learning inference pipeline.- Classify the retinal image into a diabetic-retinopathy severity grade from **Grade 0 to Grade 4**.- Obtain a model confidence value for the predicted grade.- Mark higher-grade cases as requiring specialist referral.- Track screening status and screening history.- Present the AI result to a doctor through a clinical review queue.- Allow a doctor to review the AI evidence, enter clinical findings and recommendations, and certify the final report. This creates a bridge between **automated image screening** and **human clinical validation**, rather than treating the machine-learning prediction as a final diagnosis. --- ## 3. Core Problem Being Addressed The central problem can be stated as: > **How can retinal fundus images from diabetic patients be processed through a structured, AI-assisted screening workflow that helps identify possible diabetic retinopathy cases and routes them to appropriate clinical review?** The repository addresses this by combining: **Patient & Screening Data → Fundus Image Upload → AI Inference → DR Severity Grade → Referral Flag → Doctor Review → Clinical Report** --- ## 4. Why an AI-Assisted Screening Workflow? Manual retinal screening requires trained clinical professionals to inspect fundus photographs individually. As screening volumes increase, this can create a workload that is difficult to scale, particularly in workflows where specialist review is limited. An automated screening model can act as a **first-level screening aid** by processing retinal images and identifying the predicted DR severity. The purpose of this system is therefore not to replace an ophthalmologist. Instead, the AI component can help organize the screening process and identify cases that require further attention. The repository reflects this distinction through a separate **operator workflow** and **doctor review workflow**. --- ## 5. How the Repository Addresses the Problem ### 5.1 Retinal Image Acquisition The screening interface accepts retinal fundus photographs in: - JPEG- PNG- WEBP The backend restricts uploads to a maximum size of 10 MB. Patient information such as patient ID, name, age, gender, and technician/operator information is associated with the screening record. ### 5.2 Image Storage Uploaded retinal images are sent to Cloudinary and the resulting image URL is stored with the screening record. This separates image storage from the application server and allows the screening record to reference the stored fundus image. ### 5.3 AI-Based DR Classification The repository contains an ONNX inference pipeline. The image is: 1. Loaded from its stored URL or local path.2. Converted to RGB.3. Resized to **224 × 224 pixels**.4. Normalized to the **0–1** range.5. Converted into the tensor layout required by the model.6. Passed to the ONNX Runtime inference session.7. Classified using the model output. The predicted class is selected using the highest model output, producing a DR grade from **0 through 4** along with a confidence value. ### 5.4 Screening and Referral Workflow The backend maps the AI result into a screening record and marks cases with **Grade 2 or above** as referable. This provides a simple triage mechanism: - **Grade 0–1:** lower-severity screening result.- **Grade 2–4:** referable screening result requiring specialist attention. The referral flag is intended as a screening workflow mechanism and should not be interpreted as an independent medical diagnosis. ### 5.5 Doctor Review Cases can be presented through a doctor review queue. A doctor can inspect the available AI result and retinal evidence, record whether they agree with or reclassify the AI result, add clinical recommendations, and sign/certify the report. This introduces a **human-in-the-loop** stage between automated screening and the final clinical report. --- ## 6. Explainability and AI Evidence The application includes an explainability interface based around the concept of **Grad-CAM**, showing attention heatmaps and clinical interpretation panels. The purpose of this part of the application is to make AI-assisted screening easier to inspect rather than presenting only a numerical prediction. The current repository should be understood carefully here: the ONNX inference worker itself currently returns the predicted grade and confidence. The Grad-CAM and lesion-annotation experiences present in the frontend are not currently generated by that worker as a live Grad-CAM computation. Therefore, the explainability interface represents the intended **explainable-AI screening experience**, while the production implementation of model-generated Grad-CAM attribution remains an area for further integration. --- ## 7. Users and Their Roles ### Screening Operator The operator is responsible for the initial screening workflow: - Registering patient information.- Uploading the retinal photograph.- Initiating AI processing.- Viewing screening results.- Managing screening history and reports. ### Ophthalmologist / Doctor The doctor provides clinical validation: - Reviews AI-generated screening results.- Examines the available retinal evidence.- Agrees with or reclassifies the AI result.- Adds clinical recommendations.- Certifies the final report. This separation helps establish a workflow where AI functions as a **screening assistant**, while clinical responsibility remains with the qualified healthcare professional. --- ## 8. Expected Impact If fully integrated and clinically validated, a system following this workflow could help screening programs: - Process large numbers of retinal photographs in a structured manner.- Provide consistent preliminary DR severity classification.- Identify cases that may require specialist attention.- Organize screening records and results.- Reduce unnecessary manual review of lower-risk screening cases.- Provide clinicians with an AI-assisted starting point for case review. The system is therefore aimed at improving the **organization, scalability, and efficiency of diabetic retinopathy screening**, rather than replacing clinical diagnosis. --- ## 9. Scope and Limitations RetinaGuard is an **AI-assisted screening prototype**, not a standalone medical diagnostic system. Important current limitations include: - The actual clinical performance of the included ONNX model depends on the model's training data, validation, and calibration.- The repository does not by itself establish clinical safety or diagnostic accuracy.- The AI worker currently produces a severity grade and confidence value rather than a complete lesion-detection report.- The frontend's Grad-CAM/lesion visualization is not currently connected to live Grad-CAM output from the ONNX inference worker.- Authentication and authorization require further server-side hardening before real patient data should be exposed in production.- The repository should not be deployed for real clinical use without appropriate medical validation, security controls, privacy protections, and regulatory review. --- ## 10. One-Line Problem Definition > **RetinaGuard addresses the challenge of scalable diabetic retinopathy screening by providing an AI-assisted workflow that analyzes retinal fundus photographs, classifies the predicted severity of diabetic retinopathy, identifies cases for potential specialist referral, and routes the results to a clinician for human review and certification.**"""
GurdianSafe
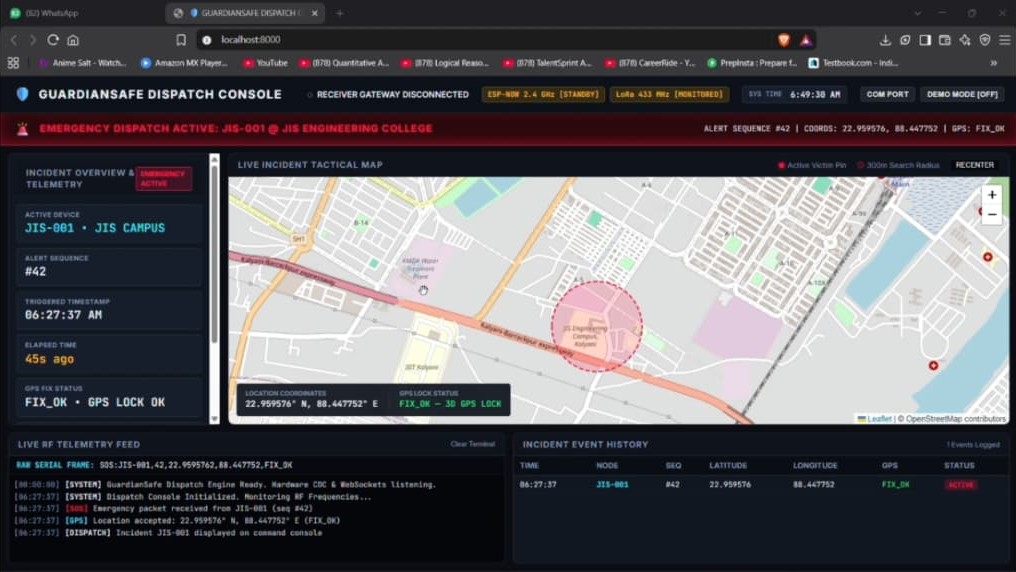
# 🛡️ GuardianSafe: Off-Grid Emergency Response & Incident Command Ecosystem GuardianSafe is a sovereign, infrastructure-independent emergency response ecosystem designed to provide instantaneous distress broadcasting and live geospatial tracking when cellular networks, mobile applications, and internet connectivity completely fail. Built specifically for extreme environments—such as underground transit tunnels, remote wilderness trails, concrete basements, or disaster-stricken blackout zones—GuardianSafe ensures that no distress signal ever goes unheard. ### 🚀 Key Features & Architecture* **True Off-Grid Communication:** Zero reliance on cellular towers, mobile SIM cards, or Wi-Fi routers using dual-band radio frequency (433MHz LoRa + 2.4GHz ESP-NOW).* **Wearable Safety Node (ESP32):** Features autonomous NEO-6M GNSS/GPS location tracking, a single-touch mechanical panic trigger with hardware interrupts, and a non-blocking active buzzer acoustic deterrent.* **Edge Gateway Receiver (ESP32-S3):** Captures incoming over-the-air ESP-NOW frames via its internal PCB antenna and instantly bridges raw CSV telemetry over USB-CDC Serial at 115200 baud.* **Tactical Incident Command Console (FastAPI & Leaflet.js):** Runs locally on an edge server, featuring full-duplex WebSockets, automated geospatial map centering (`flyTo`), custom animated pulsing beacons, a 300-meter search perimeter projection, and raw RF diagnostic logging.* **Forward-Compatible AI Hook:** Scaffolds the `VoiceIntelligenceModule` namespace for downstream edge-based audio stress analysis and voice modulation classification.*
Gesturify
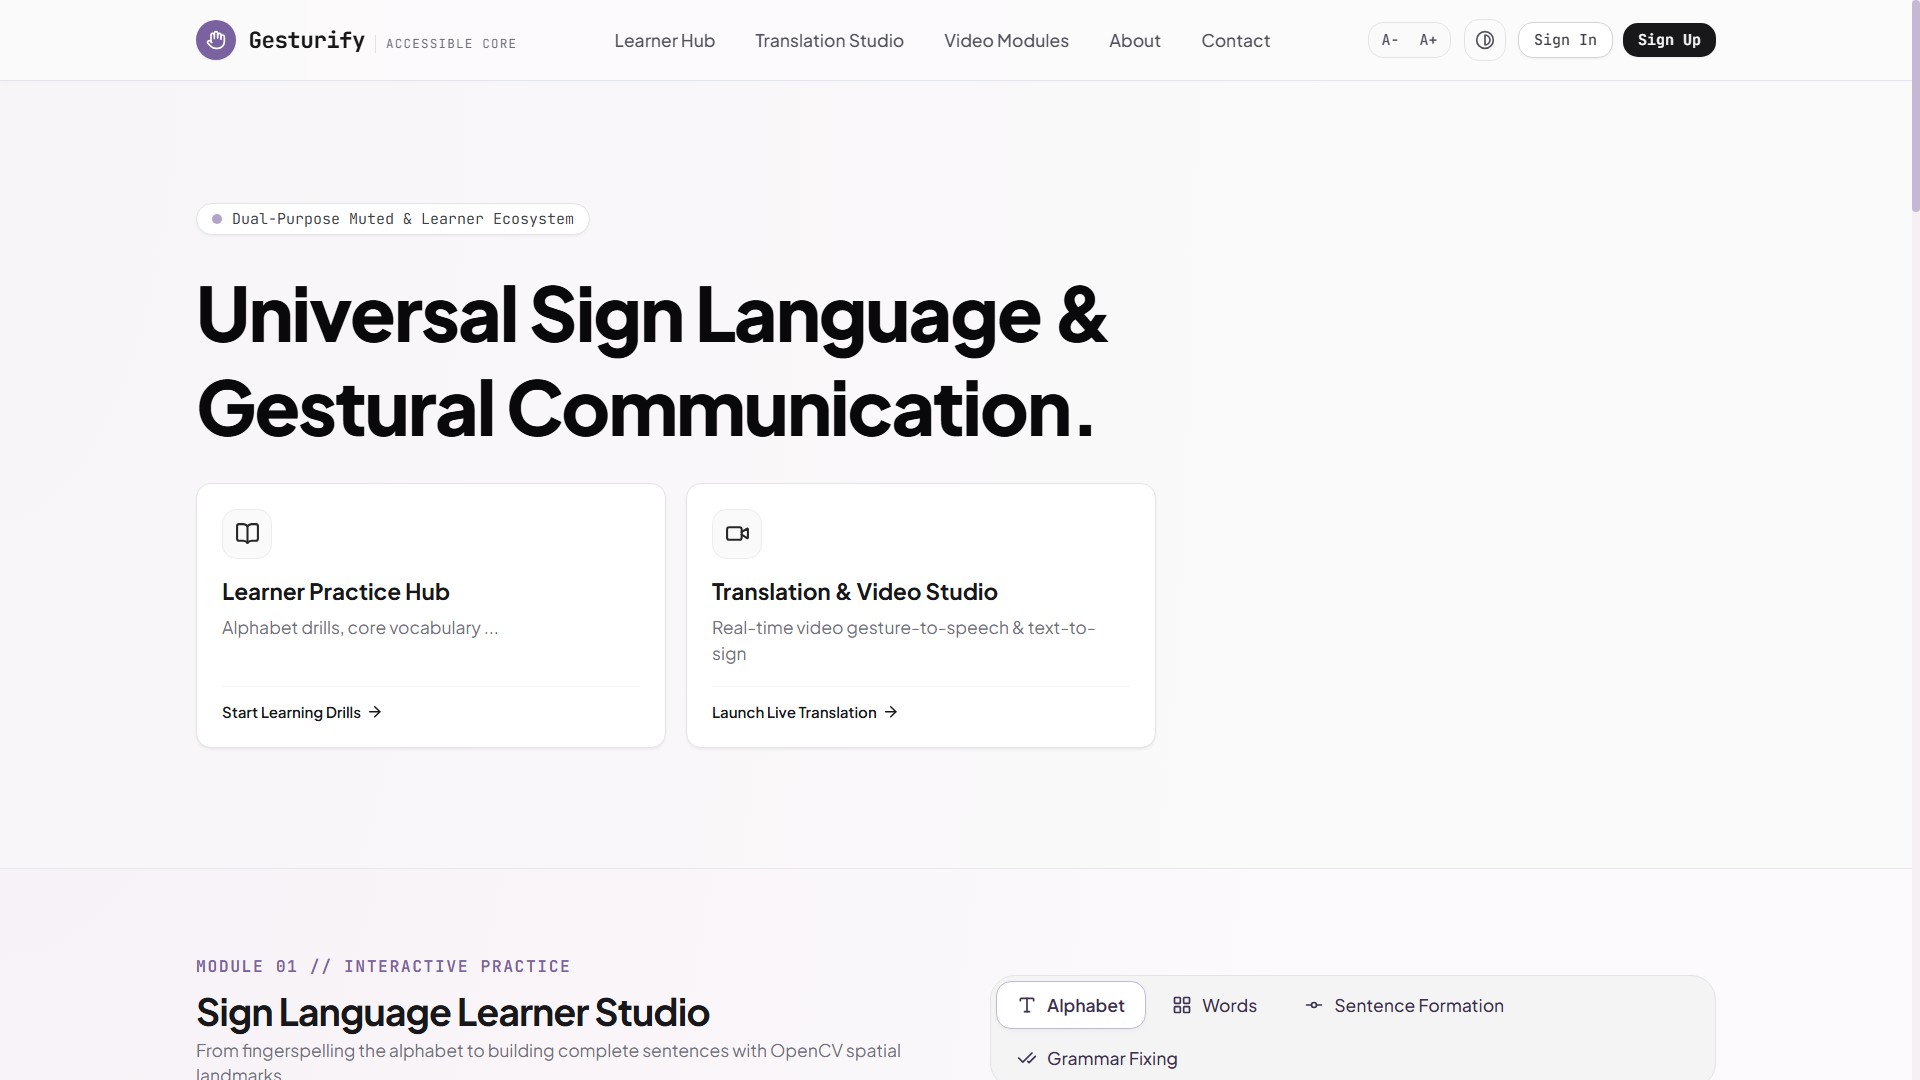
Gesturify AI is a privacy-first, real-time assistive communication platform designed to bridge the communication gap between people who use Indian Sign Language (ISL) and people who do not understand it. The platform enables bidirectional communication. It can recognize real-time ISL hand and upper-body gestures through a webcam and convert them into meaningful English/Hindi text and speech. In the reverse direction, spoken language can be converted into animated ISL gestures using a procedural skeletal avatar. Gesturify AI combines MediaPipe Vision, ONNX Runtime Web, custom 3D geometric gesture recognition, procedural skeletal animation, and Web Speech APIs to perform processing directly in the browser. This edge-first approach reduces latency, avoids the need for cloud GPU processing, and keeps camera video on the user's device. Beyond translation, Gesturify includes an ISL learning studio, A–Z fingerspelling guides, interactive grammar learning, video-based lessons, and camera-based quizzes, making it both a communication tool and an educational platform. By combining accessibility, real-time AI vision, bidirectional translation, and privacy-focused edge computing, Gesturify AI aims to make everyday communication and ISL learning more accessible, interactive, and inclusive.
Redefining accessibility Limitless learning for specially-abled minds
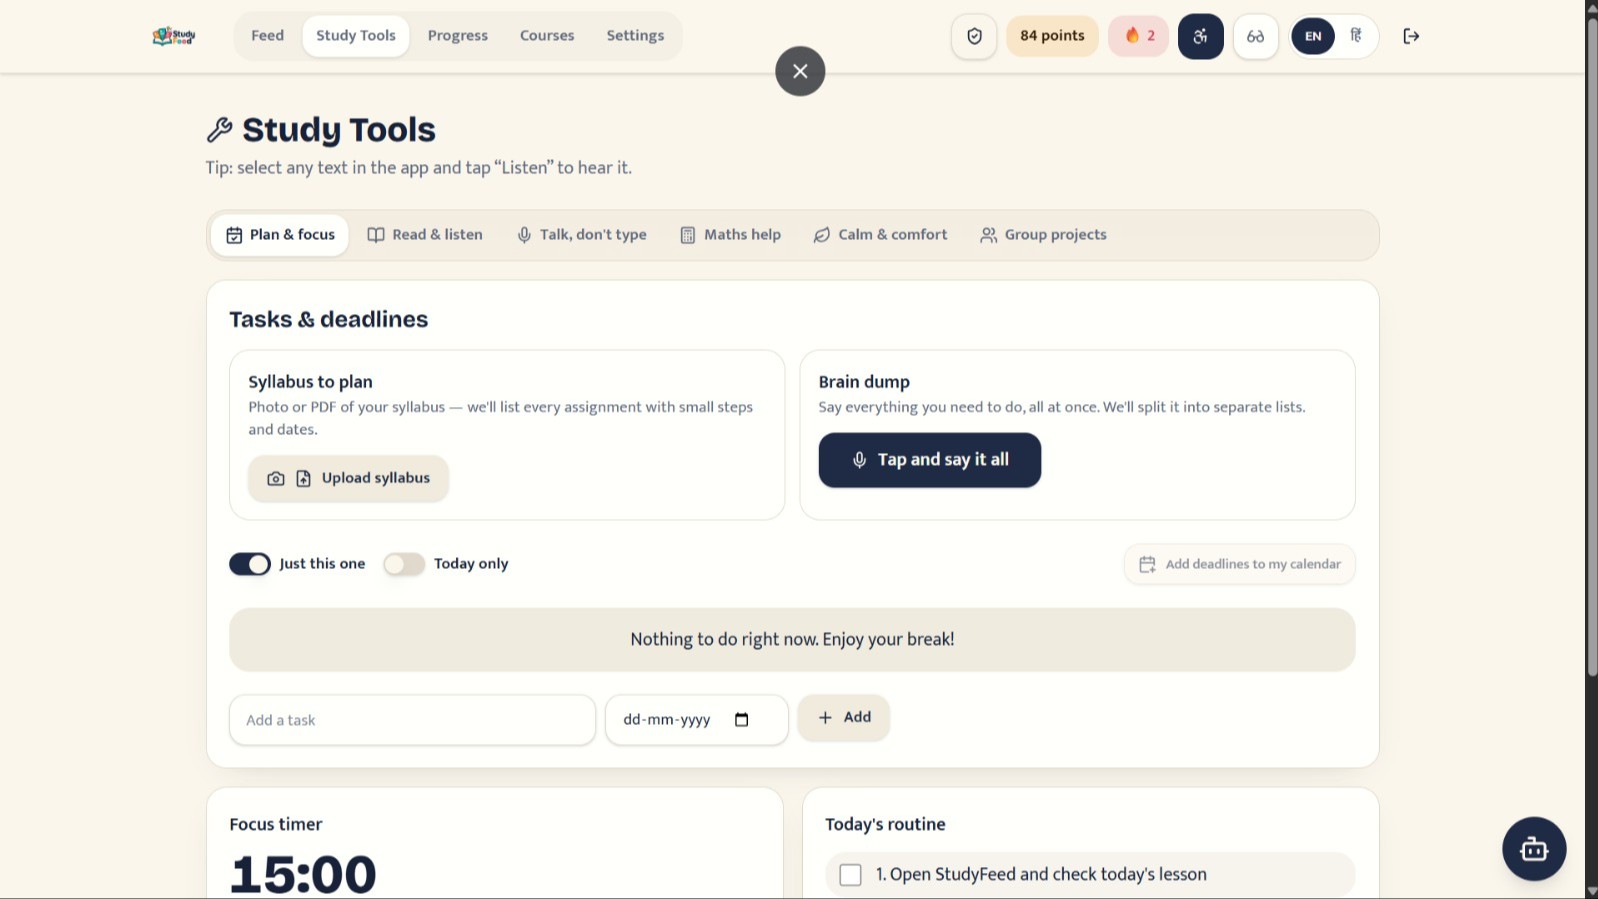
STUDYFEED AI-Powered Inclusive Learning & Verifiable Credentialing Platform StudyFeed is a privacy-first, AI-powered learning platform designed to make digital education more personalised, accessible, engaging, secure, and verifiable — without labelling students by their learning differences. Traditional educational platforms often treat personalisation and accessibility as separate features, while systems designed for neurodiverse learners can unintentionally create stigma by explicitly categorising students. StudyFeed takes a different approach: every student receives access to the complete learning toolkit, while a private personalisation engine intelligently prioritises the tools most relevant to each learner. 1. Privacy-First Personalisation Students complete a private 10-question learning-preference assessment. Instead of displaying labels such as “ADHD mode” or “Dyslexia mode,” the platform uses the assessment only to personalise the learning experience. The student and administrator never see a condition-based classification. Every learner receives access to tools such as: • Text-to-speech and read-aloud assistance • Step-by-step mathematics support • Personalised study planning • Focus and productivity tools • Calm learning mode • Learning progress and achievement tracking This enables personalisation without stigma. 2. StudyFeed — Intelligent Educational Content Discovery StudyFeed provides students with a centralised educational feed based on their class, subject, and learning requirements. A major engineering challenge was handling external video-platform API limitations. Serverless functions operating on shared cloud infrastructure encountered HTTP 429 quota and rate-limit errors, which could cause the learning feed to become empty. We solved this using a shared six-hour caching architecture. Identical class-and-subject searches are served from the cache rather than repeatedly requesting the external API. A fallback content-fetching mechanism further improves feed resilience when API quotas are unavailable. This reduces unnecessary API requests while improving reliability and continuity of the learning experience. 3. Accessible Text-to-Speech with Synchronized Reading The platform includes an integrated text-to-speech system designed for educational content. During development, browser speech engines occasionally stopped speaking without producing a useful error. We identified speech-queue conflicts and cross-language voice-selection issues as major causes. The system was redesigned with: • Speech queue cancellation and recovery • Controlled resume behaviour • Language-aware voice selection • Delayed speech initialization • Robust utterance management We then extended the system beyond basic TTS by implementing word-level highlighting synchronized with speech boundaries. Students can therefore hear the content while visually following the exact words being spoken. 4. Secure, Server-Authoritative Gamification StudyFeed uses gamification to encourage consistent learning through points, streaks, badges, achievements, and progress tracking. Because browser-side state cannot be trusted, reward generation is completely server-authoritative. The client can report that an activity has been completed, but it cannot directly award points or badges. The server validates the event before modifying the student's reward state. Database-level Row Level Security provides an additional protection layer, creating a defence-in-depth architecture against client-side manipulation and reward fraud. 5. Blockchain-Based Verifiable Credentials StudyFeed introduces a decentralised credentialing layer that connects learning achievements with verifiable digital credentials. When a student completes an eligible learning achievement, the platform can generate a digital certificate and mint the corresponding credential as an NFT on the Solana Devnet. The process can be represented as: Learning Achievement → Certificate → Blockchain Credential → Independent Verification The blockchain implementation presented an additional engineering challenge because the serverless edge environment did not provide the conventional Node.js tooling normally used for blockchain operations. We therefore implemented the required functionality using web-native libraries and seed-derived wallet infrastructure, enabling blockchain interactions within the edge-compatible environment. 6. End-to-End Architecture StudyFeed combines multiple technologies into one integrated learning ecosystem: Personalisation → Content Discovery → Accessibility → Engagement → Secure Rewards → Verifiable Credentials The architecture is built around four core principles: Personalised The learning experience adapts to individual learning preferences. Inclusive Accessibility tools are available to everyone without exposing sensitive labels. Secure Critical rewards and credential operations are controlled through server-side logic and database security. Verifiable Academic achievements can be represented through blockchain-backed credentials. 7. Innovation StudyFeed is not simply another learning management system, video aggregator, accessibility application, or blockchain certificate generator. Its innovation comes from combining AI-driven personalisation, inclusive design, accessibility technology, gamification, resilient content delivery, secure reward architecture, and decentralised credentialing into a single platform. Instead of asking: “Which category does this student belong to?” StudyFeed asks: “What learning experience can help this student learn better?” This shifts educational technology from label-based personalisation toward privacy-preserving, learner-centric adaptation. 8. Expected Impact StudyFeed aims to help students: • Discover relevant educational resources faster • Learn through multiple modalities • Access accessibility tools without stigma • Maintain motivation through meaningful progress systems • Build portable and verifiable academic achievements • Experience a learning environment designed around individual needs Ultimately, StudyFeed aims to make digital education more adaptive, inclusive, secure, and verifiable while keeping the learner at the centre of the system.
MMAR - Multimodal agentic router
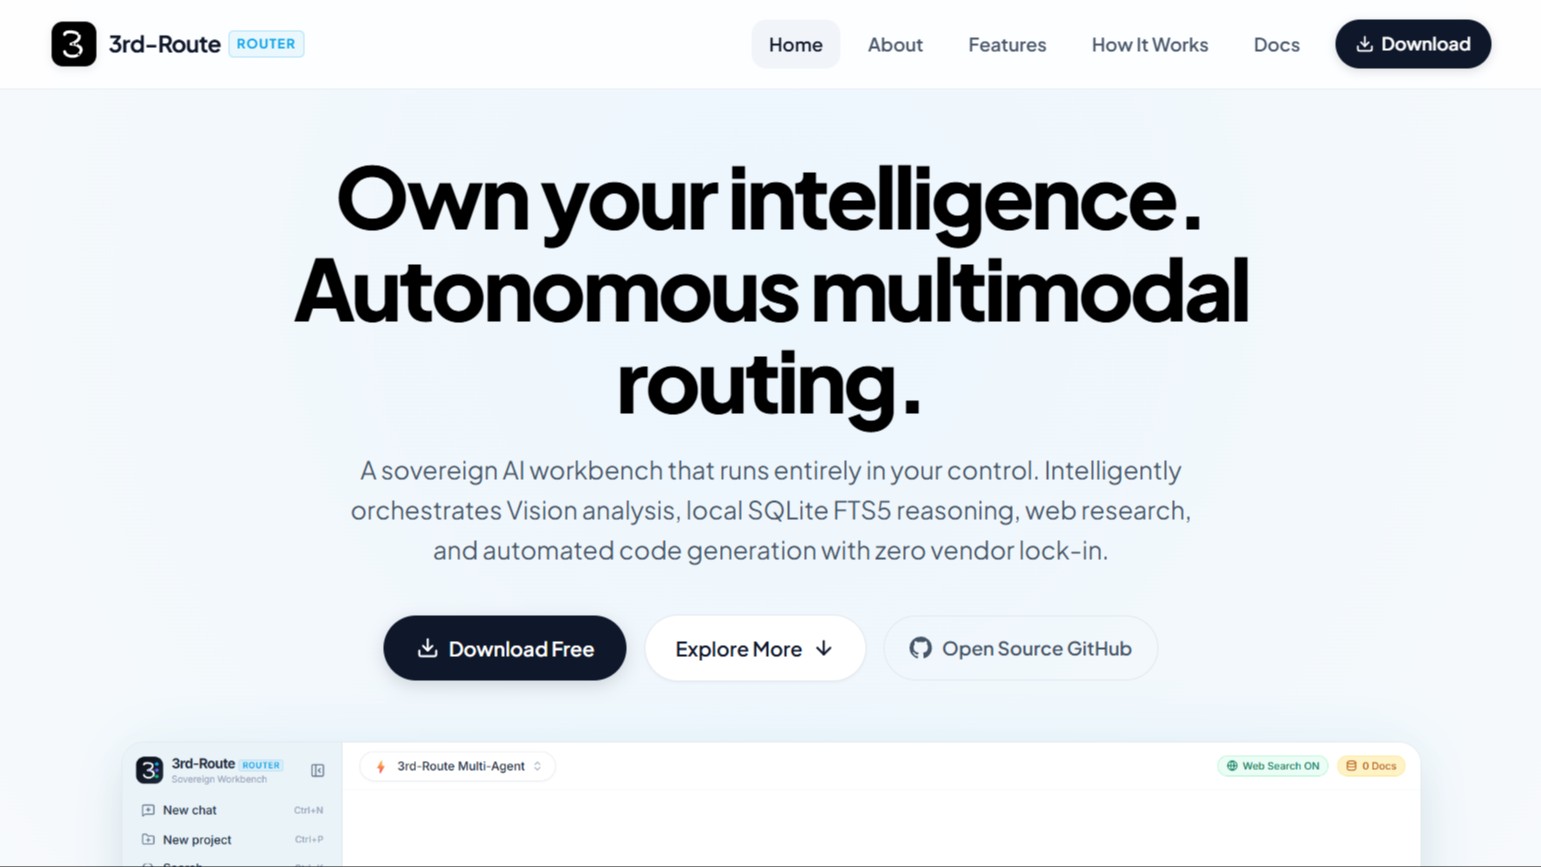
# MMAR - Multi-Modal Agentic Router A Multi-Modal Agentic Router that routes and processes tasks across vision analysis, knowledge base retrieval, web-augmented reasoning, and code generation. --- ## The Problem Modern AI applications often use a single model for fundamentally different workloads: - coding and debugging- deep reasoning and planning- image / document understanding- private company knowledge retrieval- fresh web research- code execution and testing That creates three problems: 1. **Capability mismatch** — a model optimized for reasoning may be inefficient for coding or vision.2. **Context overload** — dumping every document, tool result, and conversation turn into one prompt increases token usage and noise.3. **Weak execution** — generating an answer is not the same as retrieving evidence, running code, checking the result, and validating it. —-## Our Solution Multi-Modal Agentic Routerturns the LLM into an **orchestrated system rather than a single chatbot**. ```textUser ↓Task Analyzer ↓Model Router ├── Vision Model ├── Reasoning Model └── Coding Model ↓ Agent Engine ├── Knowledge Base / Local RAG ├── Web Augmentation ├── File Tools └── Sandbox / Code Execution ↓ Result Validation ↓ Final Output``` The system dynamically selects the model and tools required for the task instead of sending every request through the same pipeline. ## Hackathon Tracks We have used the **Auth0 track** and **.xyz track**:- **Auth0 Track**: Integrated Auth0 for secure user authentication, Universal Login, session management, and account-isolated chat sessions and knowledge base storage.- **.xyz Track**: Leveraged the `.xyz` domain track for hosting and public web deployment of the 3rd-Route workbench platform. --- ## Pipeline Architecture - Vision Stage: Analyzes images, diagrams, and error screenshots with a free OpenRouter vision model.- Reasoning Stage: Performs local RAG on ingested documents and live web search via OpenRouter to produce structured technical specifications.- Coding Stage: Implements working solutions from specifications using Ollama Cloud.- Router: Automatically determines task requirements and coordinates stage execution. ## Prerequisites - Python 3.10 or higher- Tesseract OCR (required for OCR and image text extraction) - Ubuntu/Debian: `sudo apt-get install tesseract-ocr` - macOS: `brew install tesseract` - Windows: Install via the official installer and add the installation folder to your PATH. ## Setup 1. Clone the repository: ```bash git clone <repository-url> cd MMAR ``` 2. Create and activate a virtual environment: ```bash python -m venv .venv ``` - On Windows: ```powershell .venv\Scripts\activate ``` - On Linux/macOS: ```bash source .venv/bin/activate ``` 3. Install dependencies: ```bash pip install -r requirements.txt ``` 4. Configure environment variables: Copy the example environment file: ```bash cp .env.example .env ``` Open `.env` and provide your API keys: - `OPENROUTER_API_KEY`: OpenRouter API key - `OPENROUTER_API_KEY_ALT`: Optional alternate OpenRouter key - `OLLAMA_API_KEY`: Ollama Cloud API key ## Usage ### 1. Web Frontend Mode (3rd-Route) 3rd-Route provides a modern React-based UI inspired by clean, minimalist desktop AI workbenches, with Auth0 authentication and multi-stage pipeline controls. 1. **Start the local API backend server**: - On Windows (PowerShell): ```powershell python server.py ``` - On Linux/macOS: ```bash python3 server.py ``` The backend API listens on `http://localhost:8000`. 2. **Start the React frontend**: - In a separate terminal: ```bash cd frontend npm install npm run dev ``` --- ### 2. Interactive Terminal ModeRun the router interactively:```bashpython modelrouter.py``` ### 3. CLI ModeSubmit a text query directly:```bashpython modelrouter.py --text "Explain how vector databases work."``` Submit an image with an optional prompt:```bashpython modelrouter.py --image "path/to/diagram.png" --prompt "Explain this architecture"``` Ingest a document into the local knowledge base:```bashpython knowledge.py --ingest "path/to/document.pdf"``` --- ## Release & Local Distribution 3rd-Route is designed as a **local application** distributed as release archives (`.zip`, `.tar.gz`). Users download the release archive, extract it locally, configure their keys, and run it on their own machines. ### Release Installation Flow 1. **Download & Extract** the latest release archive (`3rd-Route-v1.0.0.zip`) from GitHub Releases.2.**Release version(**3. **Create and activate the Python virtual environment**: - PowerShell: ```powershell python -m venv .venv .venv\Scripts\activate ``` - Bash (Linux/macOS): ```bash python3 -m venv .venv source .venv/bin/activate ```4. **Install Python backend dependencies**: ```bash pip install -r requirements.txt ```5. **Configure backend environment variables**: ```bash cp .env.example .env ``` Provide your `OPENROUTER_API_KEY` and `OLLAMA_API_KEY`.6. **Install and configure frontend**: ```bash cd frontend npm install cp .env.example .env.local ``` Configure `VITE_API_BASE_URL=http://localhost:8000` and Auth0 keys (`VITE_AUTH0_DOMAIN`, `VITE_AUTH0_CLIENT_ID`).7. **Start the application**: - Terminal 1: `python server.py` - Terminal 2: `cd frontend && npm run dev` --- ## Project Structure - `frontend/`: React + Vite + TypeScript web interface ("3rd-Route").- `server.py`: Local FastAPI bridge connecting the frontend to the MMAR pipeline.- `modelrouter.py`: Central orchestrator and task router.- `vision.py`: Image analysis and OCR pipeline.- `reasoning.py`: Web research, document RAG, and problem synthesis.- `coding.py`: Automated code generation.- `knowledge.py`: Document ingestion, chunking, and SQLite storage.- `llm.py`: Shared transport for OpenRouter calls.- `config.py`: Centralized configurat# MMAR - Multi-Modal Agentic Router A Multi-Modal Agentic Rout that routes and processes tasks across vision analysis, knowledge base retrieval, web-augmented reasoning, and code generation. --- ## 🏆 Hackathon Tracks We have used the **Auth0 track** and **.xyz track**:- **Auth0 Track**: Integrated Auth0 for secure user authentication, Universal Login, session management, and account-isolated chat sessions and knowledge base storage.- **.xyz Track**: Leveraged the `.xyz` domain track for hosting and public web deployment of the 3rd-Route workbench platform. --- ## Pipeline Architecture - Vision Stage: Analyzes images, diagrams, and error screenshots with a free OpenRouter vision model.- Reasoning Stage: Performs local RAG on ingested documents and live web search via OpenRouter to produce structured technical specifications.- Coding Stage: Implements working solutions from specifications using Ollama Cloud.- Router: Automatically determines task requirements and coordinates stage execution. ## Prerequisites - Python 3.10 or higher- Tesseract OCR (required for OCR and image text extraction) - Ubuntu/Debian: `sudo apt-get install tesseract-ocr` - macOS: `brew install tesseract` - Windows: Install via the official installer and add the installation folder to your PATH. ## Setup 1. Clone the repository: ```bash git clone <repository-url> cd MMAR ``` 2. Create and activate a virtual environment: ```bash python -m venv .venv ``` - On Windows: ```powershell .venv\Scripts\activate ``` - On Linux/macOS: ```bash source .venv/bin/activate ``` 3. Install dependencies: ```bash pip install -r requirements.txt ``` 4. Configure environment variables: Copy the example environment file: ```bash cp .env.example .env ``` Open `.env` and provide your API keys: - `OPENROUTER_API_KEY`: OpenRouter API key - `OPENROUTER_API_KEY_ALT`: Optional alternate OpenRouter key - `OLLAMA_API_KEY`: Ollama Cloud API key ## Usage ### 1. Web Frontend Mode (3rd-Route) 3rd-Route provides a modern React-based UI inspired by clean, minimalist desktop AI workbenches, with Auth0 authentication and multi-stage pipeline controls. 1. **Start the local API backend server**: - On Windows (PowerShell): ```powershell python server.py ``` - On Linux/macOS: ```bash python3 server.py ``` The backend API listens on `http://localhost:8000`. 2. **Start the React frontend**: - In a separate terminal: ```bash cd frontend npm install npm run dev ``` Open `http://localhost:5173` in your browser. --- ### 2. Interactive Terminal ModeRun the router interactively:```bashpython modelrouter.py``` ### 3. CLI ModeSubmit a text query directly:```bashpython modelrouter.py --text "Explain how vector databases work."``` Submit an image with an optional prompt:```bashpython modelrouter.py --image "path/to/diagram.png" --prompt "Explain this architecture"``` Ingest a document into the local knowledge base:```bashpython knowledge.py --ingest "path/to/document.pdf"``` --- ## Release & Local Distribution 3rd-Route is designed as a **local application** distributed as release archives (`.zip`, `.tar.gz`). Users download the release archive, extract it locally, configure their keys, and run it on their own machines. ### Release Installation Flow 1. **Download & Extract** the latest release archive (`3rd-Route-v1.0.0.zip`) from GitHub Releases.2. **Create and activate the Python virtual environment**: - PowerShell: ```powershell python -m venv .venv .venv\Scripts\activate ``` - Bash (Linux/macOS): ```bash python3 -m venv .venv source .venv/bin/activate ```3. **Install Python backend dependencies**: ```bash pip install -r requirements.txt ```4. **Configure backend environment variables**: ```bash cp .env.example .env ``` Provide your `OPENROUTER_API_KEY` and `OLLAMA_API_KEY`.5. **Install and configure frontend**: ```bash cd frontend npm install cp .env.example .env.local ``` Configure `VITE_API_BASE_URL=http://localhost:8000` and Auth0 keys (`VITE_AUTH0_DOMAIN`, `VITE_AUTH0_CLIENT_ID`).6. **Start the application**: - Terminal 1: `python server.py` - Terminal 2: `cd frontend && npm run dev`7. Open `http://localhost:5173` in your web browser. --- ## Project Structure - `frontend/`: React + Vite + TypeScript web interface ("3rd-Route").- `server.py`: Local FastAPI bridge connecting the frontend to the MMAR pipeline.- `modelrouter.py`: Central orchestrator and task router.- `vision.py`: Image analysis and OCR pipeline.- `reasoning.py`: Web research, document RAG, and problem synthesis.- `coding.py`: Automated code generation.- `knowledge.py`: Document ingestion, chunking, and SQLite storage.- `llm.py`: Shared transport for OpenRouter calls.- `config.py`: Centralized configurat# MMAR - Multi-Modal Agentic Router A Multi-Modal Agentic Rout that routes and processes tasks across vision analysis, knowledge base retrieval, web-augmented reasoning, and code generation. --- ## 🏆 Hackathon Tracks We have used the **Auth0 track** and **.xyz track**:- **Auth0 Track**: Integrated Auth0 for secure user authentication, Universal Login, session management, and account-isolated chat sessions and knowledge base storage.- **.xyz Track**: Leveraged the `.xyz` domain track for hosting and public web deployment of the 3rd-Route workbench platform. --- ## Pipeline Architecture - Vision Stage: Analyzes images, diagrams, and error screenshots with a free OpenRouter vision model.- Reasoning Stage: Performs local RAG on ingested documents and live web search via OpenRouter to produce structured technical specifications.- Coding Stage: Implements working solutions from specifications using Ollama Cloud.- Router: Automatically determines task requirements and coordinates stage execution. ## Prerequisites - Python 3.10 or higher- Tesseract OCR (required for OCR and image text extraction) - Ubuntu/Debian: `sudo apt-get install tesseract-ocr` - macOS: `brew install tesseract` - Windows: Install via the official installer and add the installation folder to your PATH. ## Setup 1. Clone the repository: ```bash git clone <repository-url> cd MMAR ``` 2. Create and activate a virtual environment: ```bash python -m venv .venv ``` - On Windows: ```powershell .venv\Scripts\activate ``` - On Linux/macOS: ```bash source .venv/bin/activate ``` 3. Install dependencies: ```bash pip install -r requirements.txt ``` 4. Configure environment variables: Copy the example environment file: ```bash cp .env.example .env ``` Open `.env` and provide your API keys: - `OPENROUTER_API_KEY`: OpenRouter API key - `OPENROUTER_API_KEY_ALT`: Optional alternate OpenRouter key - `OLLAMA_API_KEY`: Ollama Cloud API key ## Usage ### 1. Web Frontend Mode (3rd-Route) 3rd-Route provides a modern React-based UI inspired by clean, minimalist desktop AI workbenches, with Auth0 authentication and multi-stage pipeline controls. 1. **Start the local API backend server**: - On Windows (PowerShell): ```powershell python server.py ``` - On Linux/macOS: ```bash python3 server.py ``` The backend API listens on `http://localhost:8000`. 2. **Start the React frontend**: - In a separate terminal: ```bash cd frontend npm install npm run dev ``` Open `http://localhost:5173` in your browser. --- ### 2. Interactive Terminal ModeRun the router interactively:```bashpython modelrouter.py``` ### 3. CLI ModeSubmit a text query directly:```bashpython modelrouter.py --text "Explain how vector databases work."``` Submit an image with an optional prompt:```bashpython modelrouter.py --image "path/to/diagram.png" --prompt "Explain this architecture"``` Ingest a document into the local knowledge base:```bashpython knowledge.py --ingest "path/to/document.pdf"``` --- ## Release & Local Distribution 3rd-Route is designed as a **local application** distributed as release archives (`.zip`, `.tar.gz`). Users download the release archive, extract it locally, configure their keys, and run it on their own machines. ### Release Installation Flow 1. **Download & Extract** the latest release archive (`3rd-Route-v1.0.0.zip`) from GitHub Releases.2. **Create and activate the Python virtual environment**: - PowerShell: ```powershell python -m venv .venv .venv\Scripts\activate ``` - Bash (Linux/macOS): ```bash python3 -m venv .venv source .venv/bin/activate ```3. **Install Python backend dependencies**: ```bash pip install -r requirements.txt ```4. **Configure backend environment variables**: ```bash cp .env.example .env ``` Provide your `OPENROUTER_API_KEY` and `OLLAMA_API_KEY`.5. **Install and configure frontend**: ```bash cd frontend npm install cp .env.example .env.local ``` Configure `VITE_API_BASE_URL=http://localhost:8000` and Auth0 keys (`VITE_AUTH0_DOMAIN`, `VITE_AUTH0_CLIENT_ID`).6. **Start the application**: - Terminal 1: `python server.py` - Terminal 2: `cd frontend && npm run dev`7. Open `http://localhost:5173` in your web browser. --- ## Project Structure - `frontend/`: React + Vite + TypeScript web interface ("3rd-Route").- `server.py`: Local FastAPI bridge connecting the frontend to the MMAR pipeline.- `modelrouter.py`: Central orchestrator and task router.- `vision.py`: Image analysis and OCR pipeline.- `reasoning.py`: Web research, document RAG, and problem synthesis.- `coding.py`: Automated code generation.- `knowledge.py`: Document ingestion, chunking, and SQLite storage.- `llm.py`: Shared transport for OpenRouter calls.- `config.py`: Centralized configurat# MMAR - Multi-Modal Agentic Router A Multi-Modal Agentic Rout that routes and processes tasks across vision analysis, knowledge base retrieval, web-augmented reasoning, and code generation. --- ## 🏆 Hackathon Tracks We have used the **Auth0 track** and **.xyz track**:- **Auth0 Track**: Integrated Auth0 for secure user authentication, Universal Login, session management, and account-isolated chat sessions and knowledge base storage.- **.xyz Track**: Leveraged the `.xyz` domain track for hosting and public web deployment of the 3rd-Route workbench platform. --- ## Pipeline Architecture - Vision Stage: Analyzes images, diagrams, and error screenshots with a free OpenRouter vision model.- Reasoning Stage: Performs local RAG on ingested documents and live web search via OpenRouter to produce structured technical specifications.- Coding Stage: Implements working solutions from specifications using Ollama Cloud.- Router: Automatically determines task requirements and coordinates stage execution. ## Prerequisites - Python 3.10 or higher- Tesseract OCR (required for OCR and image text extraction) - Ubuntu/Debian: `sudo apt-get install tesseract-ocr` - macOS: `brew install tesseract` - Windows: Install via the official installer and add the installation folder to your PATH. ## Setup 1. Clone the repository: ```bash git clone <repository-url> cd MMAR ``` 2. Create and activate a virtual environment: ```bash python -m venv .venv ``` - On Windows: ```powershell .venv\Scripts\activate ``` - On Linux/macOS: ```bash source .venv/bin/activate ``` 3. Install dependencies: ```bash pip install -r requirements.txt ``` 4. Configure environment variables: Copy the example environment file: ```bash cp .env.example .env ``` Open `.env` and provide your API keys: - `OPENROUTER_API_KEY`: OpenRouter API key - `OPENROUTER_API_KEY_ALT`: Optional alternate OpenRouter key - `OLLAMA_API_KEY`: Ollama Cloud API key ## Usage ### 1. Web Frontend Mode (3rd-Route) 3rd-Route provides a modern React-based UI inspired by clean, minimalist desktop AI workbenches, with Auth0 authentication and multi-stage pipeline controls. 1. **Start the local API backend server**: - On Windows (PowerShell): ```powershell python server.py ``` - On Linux/macOS: ```bash python3 server.py ``` The backend API listens on `http://localhost:8000`. 2. **Start the React frontend**: - In a separate terminal: ```bash cd frontend npm install npm run dev ``` Open `http://localhost:5173` in your browser. --- ### 2. Interactive Terminal ModeRun the router interactively:```bashpython modelrouter.py``` ### 3. CLI ModeSubmit a text query directly:```bashpython modelrouter.py --text "Explain how vector databases work."``` Submit an image with an optional prompt:```bashpython modelrouter.py --image "path/to/diagram.png" --prompt "Explain this architecture"``` Ingest a document into the local knowledge base:```bashpython knowledge.py --ingest "path/to/document.pdf"``` --- ## Release & Local Distribution 3rd-Route is designed as a **local application** distributed as release archives (`.zip`, `.tar.gz`). Users download the release archive, extract it locally, configure their keys, and run it on their own machines. ### Release Installation Flow 1. **Download & Extract** the latest release archive (`3rd-Route-v1.0.0.zip`) from GitHub Releases.2.**Release version**- https://github.com/ranitpal77/3rd-Route/releases/tag/version3. **Create and activate the Python virtual environment**: - PowerShell: ```powershell python -m venv .venv .venv\Scripts\activate ``` - Bash (Linux/macOS): ```bash python3 -m venv .venv source .venv/bin/activate ```4. **Install Python backend dependencies**: ```bash pip install -r requirements.txt ```5. **Configure backend environment variables**: ```bash cp .env.example .env ``` Provide your `OPENROUTER_API_KEY` and `OLLAMA_API_KEY`.6. **Install and configure frontend**: ```bash cd frontend npm install cp .env.example .env.local ``` Configure `VITE_API_BASE_URL=http://localhost:8000` and Auth0 keys (`VITE_AUTH0_DOMAIN`, `VITE_AUTH0_CLIENT_ID`).67 **Start the application**: - Terminal 1: `python server.py` - Terminal 2: `cd frontend && npm run dev`7. Open `http://localhost:5173` in your web browser. --- ## Project Structure - `frontend/`: React + Vite + TypeScript web interface ("3rd-Route").- `server.py`: Local FastAPI bridge connecting the frontend to the MMAR pipeline.- `modelrouter.py`: Central orchestrator and task router.- `vision.py`: Image analysis and OCR pipeline.- `reasoning.py`: Web research, document RAG, and problem synthesis.- `coding.py`: Automated code generation.- `knowledge.py`: Document ingestion, chunking, and SQLite storage.- `llm.py`: Shared transport for OpenRouter calls.- `config.py`: Centralized configurat
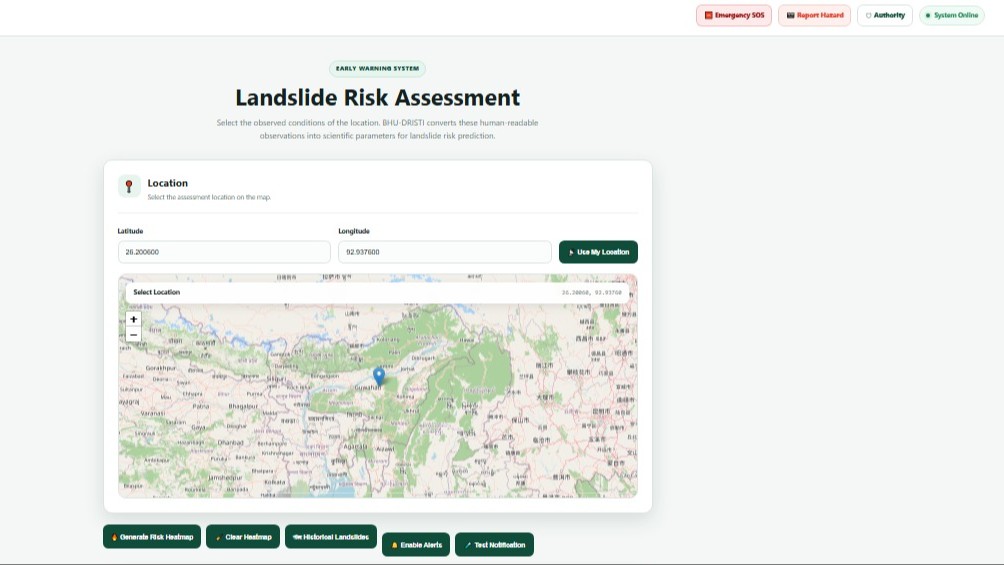
BHUDRISTI-AI-Powered Landslide Risk Intelligence & Early Warning System
BHU-DRISTI (भू-दृष्टि): 1. EXECUTIVE OVERVIEW BHU-DRISTI is an AI-powered early warning and disaster response system designed to mitigate landslide risks in vulnerable mountainous regions. The platform combines machine learning predictions from wireless sensor network (WSN) telemetry, real-time crowdsourced hazard reporting, emergency SOS dispatch, and offline-first progressive web application (PWA) architecture to ensure uninterrupted field utility during severe network disruptions. 2. Core Problem & Objectives Lack of Real-Time Ground Warnings: Conventional landslide monitoring relies heavily on satellite updates that can face latency during storm conditions. Network Vulnerability in Disaster Zones: Mountainous and landslide-prone regions often suffer severe communication cutoffs, rendering standard cloud-only emergency portals unreachable. Delayed Authority Response: Citizens and first responders lack direct channels to report localized hazards with precise geolocations, photographic proof, and automated alerts to disaster management teams. BHU-DRISTI resolves these issues by delivering continuous sensor risk evaluation, localized browser caching, and automated authority escalation. 3. Key Features & Capabilities AI Landslide Risk Prediction: Uses an XGBoost Classifier trained on environmental telemetry (slope angle, soil moisture, rainfall intensity, vibration, etc.). Calculates real-time hazard probabilities categorized into clear severity bands (Low, Medium, High) to trigger preventive actions. Offline-First PWA Resilience: Employs Service Workers (sw.js) and IndexedDB / Web Storage (offline-sync.js) to enable full offline functionality. Field responders and residents can capture reports without internet; data queues locally and automatically pushes to the central backend once connectivity is restored. Crowdsourced Hazard Reporting: Allows users to submit active ground hazards with GPS coordinates, severity descriptions, and photographic attachments stored on the server. Emergency SOS Distress Trigger: A dedicated single-click distress mechanism (sos.html) that extracts device geolocation and dispatches immediate high-priority alerts. Automated Authority Notification Engine: An automated SMTP email dispatch service (authority_notification.py) that instantly alerts district disaster management authorities when high-risk hazards or SOS events are logged. Interactive Authority Dashboard: A command-and-control portal (authority_dashboard.html) mapping active incidents, historical landslide zones (historical_landslides.geojson), and live emergency statuses for rescue prioritization. 4. Technical Architecture Frontend: HTML5, CSS3, JavaScript, Leaflet.js, and PWA Service Workers. Backend: Python Flask (app.py, platform_features.py) providing REST APIs and file upload orchestration. Machine Learning: XGBoost, Scikit-learn, Pandas, and NumPy (landslide_xgboost.json, train_model.py). Database & Storage: SQLite (bhu_dristi.db), GeoJSON vector files, and local file storage for media evidence. Deployment: Dockerized containerization (Dockerfile) for cross-platform portability and rapid setup. 5. Impact & Value Proposition Zero Downtime in Remote Terrain: Guarantees critical reporting survives network dropouts via client-side offline sync. Proactive Rather Than Reactive: Moves beyond post-disaster recovery to preemptive warning through sensor-driven machine learning. Direct Citizen-to-Authority Bridge: Connects stranded citizens directly to disaster relief response units with actionable location intelligence.
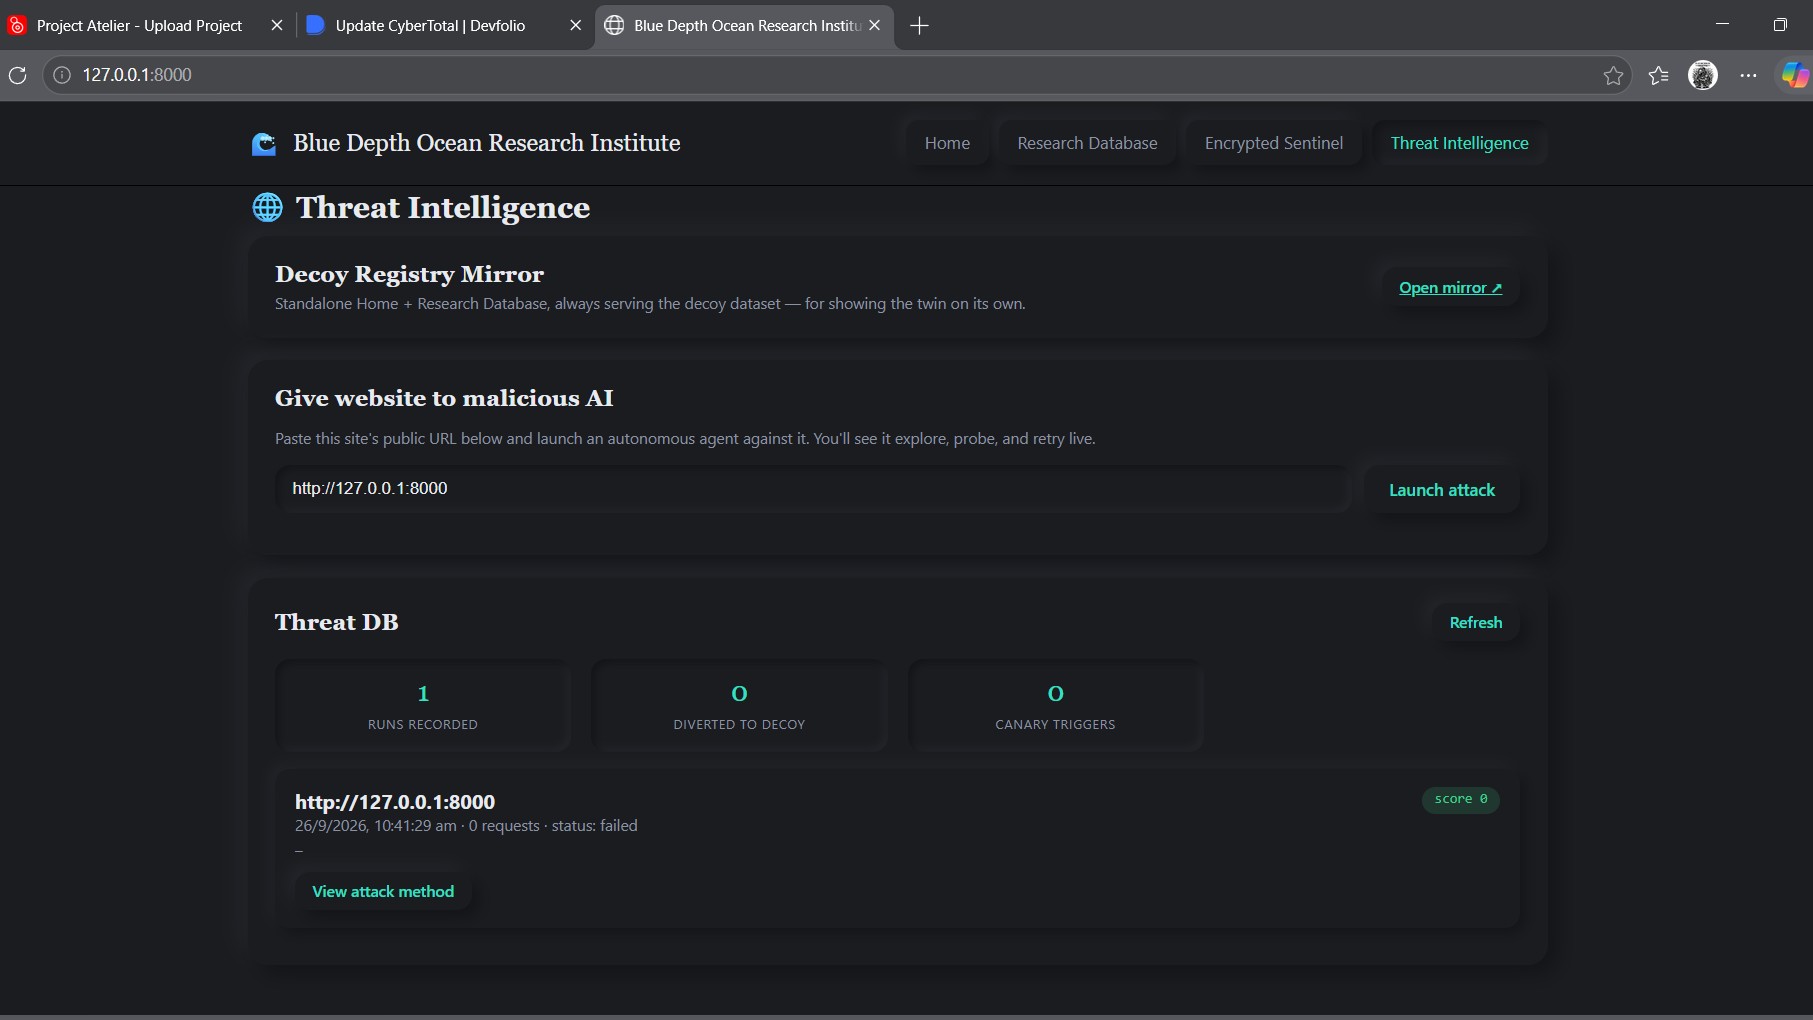
Cybertotal
CyberTotal is an AI-agent security platform designed to protect websites and APIs from increasingly autonomous AI-driven threats. It detects suspicious agent behavior using multiple behavioral signals rather than relying only on traditional bot signatures. When a session is identified as high-risk, CyberTotal can transparently route it to an isolated Digital Twin of the application, keeping the real system protected while safely observing the attacker’s behavior. The platform combines Detect → Deceive → Learn → Defend: suspicious activity is detected, contained in a realistic synthetic environment, analyzed to generate threat intelligence, and used to strengthen future defenses. With CyberTotal Sentinel, the system can also continuously monitor endpoints and identify potential security weaknesses. CyberTotal aims to create a new security layer for the agentic web—protecting real systems while turning malicious AI-agent behavior into actionable intelligence.