MMAR - Multimodal agentic router
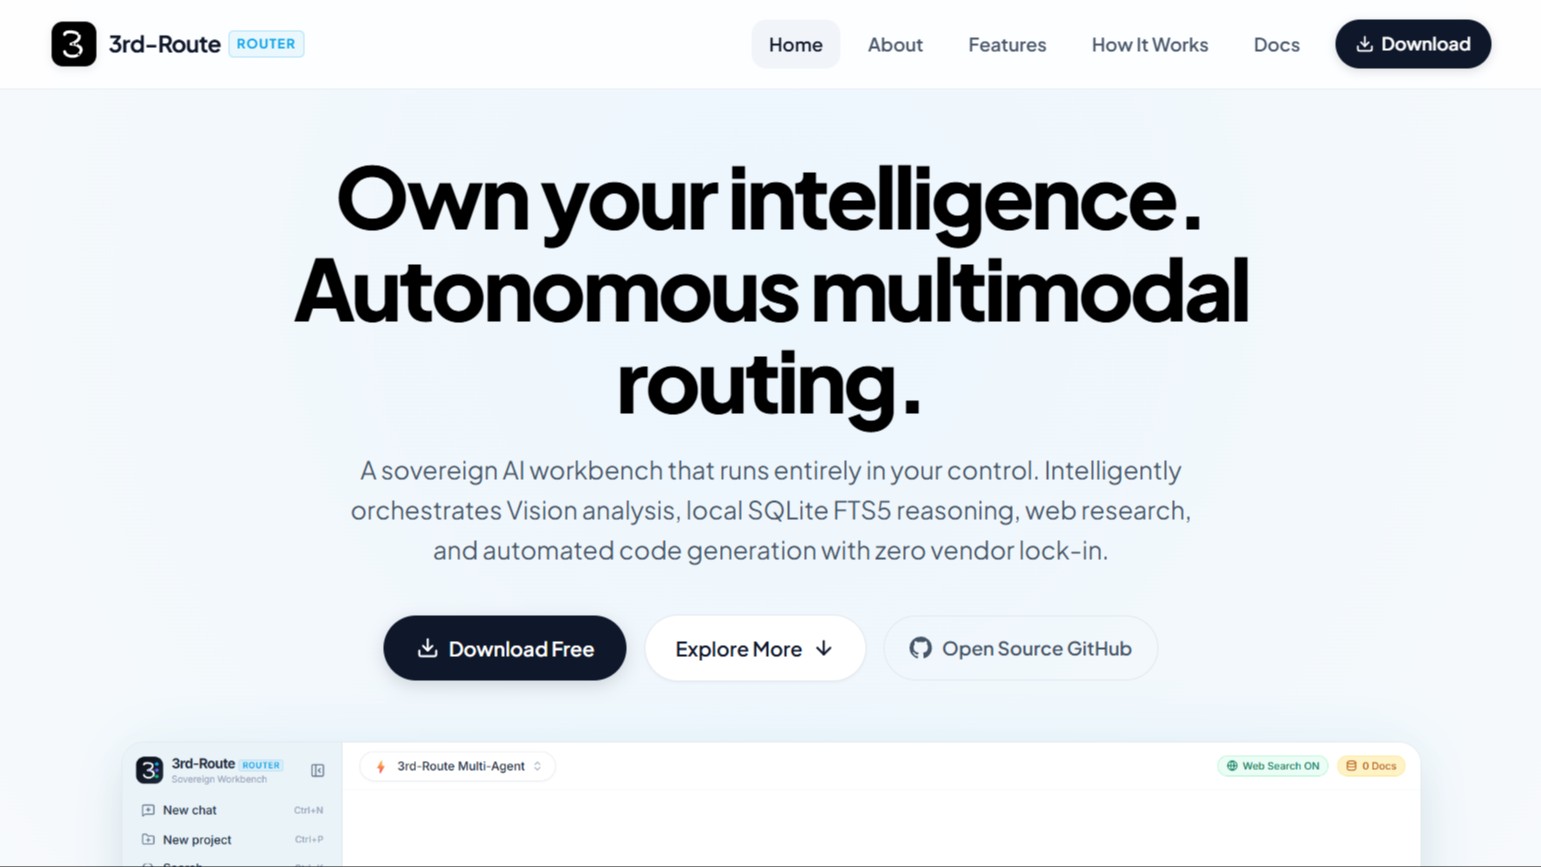
# MMAR - Multi-Modal Agentic Router
A Multi-Modal Agentic Router that routes and processes tasks across vision analysis, knowledge base retrieval, web-augmented reasoning, and code generation.
---
## The Problem
Modern AI applications often use a single model for fundamentally different workloads:
- coding and debugging
- deep reasoning and planning
- image / document understanding
- private company knowledge retrieval
- fresh web research
- code execution and testing
That creates three problems:
1. **Capability mismatch** — a model optimized for reasoning may be inefficient for coding or vision.
2. **Context overload** — dumping every document, tool result, and conversation turn into one prompt increases token usage and noise.
3. **Weak execution** — generating an answer is not the same as retrieving evidence, running code, checking the result, and validating it.
—-
## Our Solution
Multi-Modal Agentic Routerturns the LLM into an **orchestrated system rather than a single chatbot**.
```text
User
↓
Task Analyzer
↓
Model Router
├── Vision Model
├── Reasoning Model
└── Coding Model
↓
Agent Engine
├── Knowledge Base / Local RAG
├── Web Augmentation
├── File Tools
└── Sandbox / Code Execution
↓
Result Validation
↓
Final Output
```
The system dynamically selects the model and tools required for the task instead of sending every request through the same pipeline.
## Hackathon Tracks
We have used the **Auth0 track** and **.xyz track**:
- **Auth0 Track**: Integrated Auth0 for secure user authentication, Universal Login, session management, and account-isolated chat sessions and knowledge base storage.
- **.xyz Track**: Leveraged the `.xyz` domain track for hosting and public web deployment of the 3rd-Route workbench platform.
---
## Pipeline Architecture
- Vision Stage: Analyzes images, diagrams, and error screenshots with a free OpenRouter vision model.
- Reasoning Stage: Performs local RAG on ingested documents and live web search via OpenRouter to produce structured technical specifications.
- Coding Stage: Implements working solutions from specifications using Ollama Cloud.
- Router: Automatically determines task requirements and coordinates stage execution.
## Prerequisites
- Python 3.10 or higher
- Tesseract OCR (required for OCR and image text extraction)
- Ubuntu/Debian: `sudo apt-get install tesseract-ocr`
- macOS: `brew install tesseract`
- Windows: Install via the official installer and add the installation folder to your PATH.
## Setup
1. Clone the repository:
```bash
git clone <repository-url>
cd MMAR
```
2. Create and activate a virtual environment:
```bash
python -m venv .venv
```
- On Windows:
```powershell
.venv\Scripts\activate
```
- On Linux/macOS:
```bash
source .venv/bin/activate
```
3. Install dependencies:
```bash
pip install -r requirements.txt
```
4. Configure environment variables:
Copy the example environment file:
```bash
cp .env.example .env
```
Open `.env` and provide your API keys:
- `OPENROUTER_API_KEY`: OpenRouter API key
- `OPENROUTER_API_KEY_ALT`: Optional alternate OpenRouter key
- `OLLAMA_API_KEY`: Ollama Cloud API key
## Usage
### 1. Web Frontend Mode (3rd-Route)
3rd-Route provides a modern React-based UI inspired by clean, minimalist desktop AI workbenches, with Auth0 authentication and multi-stage pipeline controls.
1. **Start the local API backend server**:
- On Windows (PowerShell):
```powershell
python server.py
```
- On Linux/macOS:
```bash
python3 server.py
```
The backend API listens on `http://localhost:8000`.
2. **Start the React frontend**:
- In a separate terminal:
```bash
cd frontend
npm install
npm run dev
```
---
### 2. Interactive Terminal Mode
Run the router interactively:
```bash
python modelrouter.py
```
### 3. CLI Mode
Submit a text query directly:
```bash
python modelrouter.py --text "Explain how vector databases work."
```
Submit an image with an optional prompt:
```bash
python modelrouter.py --image "path/to/diagram.png" --prompt "Explain this architecture"
```
Ingest a document into the local knowledge base:
```bash
python knowledge.py --ingest "path/to/document.pdf"
```
---
## Release & Local Distribution
3rd-Route is designed as a **local application** distributed as release archives (`.zip`, `.tar.gz`). Users download the release archive, extract it locally, configure their keys, and run it on their own machines.
### Release Installation Flow
1. **Download & Extract** the latest release archive (`3rd-Route-v1.0.0.zip`) from GitHub Releases.
2.**Release version(**
3. **Create and activate the Python virtual environment**:
- PowerShell:
```powershell
python -m venv .venv
.venv\Scripts\activate
```
- Bash (Linux/macOS):
```bash
python3 -m venv .venv
source .venv/bin/activate
```
4. **Install Python backend dependencies**:
```bash
pip install -r requirements.txt
```
5. **Configure backend environment variables**:
```bash
cp .env.example .env
```
Provide your `OPENROUTER_API_KEY` and `OLLAMA_API_KEY`.
6. **Install and configure frontend**:
```bash
cd frontend
npm install
cp .env.example .env.local
```
Configure `VITE_API_BASE_URL=http://localhost:8000` and Auth0 keys (`VITE_AUTH0_DOMAIN`, `VITE_AUTH0_CLIENT_ID`).
7. **Start the application**:
- Terminal 1: `python server.py`
- Terminal 2: `cd frontend && npm run dev`
---
## Project Structure
- `frontend/`: React + Vite + TypeScript web interface ("3rd-Route").
- `server.py`: Local FastAPI bridge connecting the frontend to the MMAR pipeline.
- `modelrouter.py`: Central orchestrator and task router.
- `vision.py`: Image analysis and OCR pipeline.
- `reasoning.py`: Web research, document RAG, and problem synthesis.
- `coding.py`: Automated code generation.
- `knowledge.py`: Document ingestion, chunking, and SQLite storage.
- `llm.py`: Shared transport for OpenRouter calls.
- `config.py`: Centralized configurat# MMAR - Multi-Modal Agentic Router
A Multi-Modal Agentic Rout that routes and processes tasks across vision analysis, knowledge base retrieval, web-augmented reasoning, and code generation.
---
## 🏆 Hackathon Tracks
We have used the **Auth0 track** and **.xyz track**:
- **Auth0 Track**: Integrated Auth0 for secure user authentication, Universal Login, session management, and account-isolated chat sessions and knowledge base storage.
- **.xyz Track**: Leveraged the `.xyz` domain track for hosting and public web deployment of the 3rd-Route workbench platform.
---
## Pipeline Architecture
- Vision Stage: Analyzes images, diagrams, and error screenshots with a free OpenRouter vision model.
- Reasoning Stage: Performs local RAG on ingested documents and live web search via OpenRouter to produce structured technical specifications.
- Coding Stage: Implements working solutions from specifications using Ollama Cloud.
- Router: Automatically determines task requirements and coordinates stage execution.
## Prerequisites
- Python 3.10 or higher
- Tesseract OCR (required for OCR and image text extraction)
- Ubuntu/Debian: `sudo apt-get install tesseract-ocr`
- macOS: `brew install tesseract`
- Windows: Install via the official installer and add the installation folder to your PATH.
## Setup
1. Clone the repository:
```bash
git clone <repository-url>
cd MMAR
```
2. Create and activate a virtual environment:
```bash
python -m venv .venv
```
- On Windows:
```powershell
.venv\Scripts\activate
```
- On Linux/macOS:
```bash
source .venv/bin/activate
```
3. Install dependencies:
```bash
pip install -r requirements.txt
```
4. Configure environment variables:
Copy the example environment file:
```bash
cp .env.example .env
```
Open `.env` and provide your API keys:
- `OPENROUTER_API_KEY`: OpenRouter API key
- `OPENROUTER_API_KEY_ALT`: Optional alternate OpenRouter key
- `OLLAMA_API_KEY`: Ollama Cloud API key
## Usage
### 1. Web Frontend Mode (3rd-Route)
3rd-Route provides a modern React-based UI inspired by clean, minimalist desktop AI workbenches, with Auth0 authentication and multi-stage pipeline controls.
1. **Start the local API backend server**:
- On Windows (PowerShell):
```powershell
python server.py
```
- On Linux/macOS:
```bash
python3 server.py
```
The backend API listens on `http://localhost:8000`.
2. **Start the React frontend**:
- In a separate terminal:
```bash
cd frontend
npm install
npm run dev
```
Open `http://localhost:5173` in your browser.
---
### 2. Interactive Terminal Mode
Run the router interactively:
```bash
python modelrouter.py
```
### 3. CLI Mode
Submit a text query directly:
```bash
python modelrouter.py --text "Explain how vector databases work."
```
Submit an image with an optional prompt:
```bash
python modelrouter.py --image "path/to/diagram.png" --prompt "Explain this architecture"
```
Ingest a document into the local knowledge base:
```bash
python knowledge.py --ingest "path/to/document.pdf"
```
---
## Release & Local Distribution
3rd-Route is designed as a **local application** distributed as release archives (`.zip`, `.tar.gz`). Users download the release archive, extract it locally, configure their keys, and run it on their own machines.
### Release Installation Flow
1. **Download & Extract** the latest release archive (`3rd-Route-v1.0.0.zip`) from GitHub Releases.
2. **Create and activate the Python virtual environment**:
- PowerShell:
```powershell
python -m venv .venv
.venv\Scripts\activate
```
- Bash (Linux/macOS):
```bash
python3 -m venv .venv
source .venv/bin/activate
```
3. **Install Python backend dependencies**:
```bash
pip install -r requirements.txt
```
4. **Configure backend environment variables**:
```bash
cp .env.example .env
```
Provide your `OPENROUTER_API_KEY` and `OLLAMA_API_KEY`.
5. **Install and configure frontend**:
```bash
cd frontend
npm install
cp .env.example .env.local
```
Configure `VITE_API_BASE_URL=http://localhost:8000` and Auth0 keys (`VITE_AUTH0_DOMAIN`, `VITE_AUTH0_CLIENT_ID`).
6. **Start the application**:
- Terminal 1: `python server.py`
- Terminal 2: `cd frontend && npm run dev`
7. Open `http://localhost:5173` in your web browser.
---
## Project Structure
- `frontend/`: React + Vite + TypeScript web interface ("3rd-Route").
- `server.py`: Local FastAPI bridge connecting the frontend to the MMAR pipeline.
- `modelrouter.py`: Central orchestrator and task router.
- `vision.py`: Image analysis and OCR pipeline.
- `reasoning.py`: Web research, document RAG, and problem synthesis.
- `coding.py`: Automated code generation.
- `knowledge.py`: Document ingestion, chunking, and SQLite storage.
- `llm.py`: Shared transport for OpenRouter calls.
- `config.py`: Centralized configurat# MMAR - Multi-Modal Agentic Router
A Multi-Modal Agentic Rout that routes and processes tasks across vision analysis, knowledge base retrieval, web-augmented reasoning, and code generation.
---
## 🏆 Hackathon Tracks
We have used the **Auth0 track** and **.xyz track**:
- **Auth0 Track**: Integrated Auth0 for secure user authentication, Universal Login, session management, and account-isolated chat sessions and knowledge base storage.
- **.xyz Track**: Leveraged the `.xyz` domain track for hosting and public web deployment of the 3rd-Route workbench platform.
---
## Pipeline Architecture
- Vision Stage: Analyzes images, diagrams, and error screenshots with a free OpenRouter vision model.
- Reasoning Stage: Performs local RAG on ingested documents and live web search via OpenRouter to produce structured technical specifications.
- Coding Stage: Implements working solutions from specifications using Ollama Cloud.
- Router: Automatically determines task requirements and coordinates stage execution.
## Prerequisites
- Python 3.10 or higher
- Tesseract OCR (required for OCR and image text extraction)
- Ubuntu/Debian: `sudo apt-get install tesseract-ocr`
- macOS: `brew install tesseract`
- Windows: Install via the official installer and add the installation folder to your PATH.
## Setup
1. Clone the repository:
```bash
git clone <repository-url>
cd MMAR
```
2. Create and activate a virtual environment:
```bash
python -m venv .venv
```
- On Windows:
```powershell
.venv\Scripts\activate
```
- On Linux/macOS:
```bash
source .venv/bin/activate
```
3. Install dependencies:
```bash
pip install -r requirements.txt
```
4. Configure environment variables:
Copy the example environment file:
```bash
cp .env.example .env
```
Open `.env` and provide your API keys:
- `OPENROUTER_API_KEY`: OpenRouter API key
- `OPENROUTER_API_KEY_ALT`: Optional alternate OpenRouter key
- `OLLAMA_API_KEY`: Ollama Cloud API key
## Usage
### 1. Web Frontend Mode (3rd-Route)
3rd-Route provides a modern React-based UI inspired by clean, minimalist desktop AI workbenches, with Auth0 authentication and multi-stage pipeline controls.
1. **Start the local API backend server**:
- On Windows (PowerShell):
```powershell
python server.py
```
- On Linux/macOS:
```bash
python3 server.py
```
The backend API listens on `http://localhost:8000`.
2. **Start the React frontend**:
- In a separate terminal:
```bash
cd frontend
npm install
npm run dev
```
Open `http://localhost:5173` in your browser.
---
### 2. Interactive Terminal Mode
Run the router interactively:
```bash
python modelrouter.py
```
### 3. CLI Mode
Submit a text query directly:
```bash
python modelrouter.py --text "Explain how vector databases work."
```
Submit an image with an optional prompt:
```bash
python modelrouter.py --image "path/to/diagram.png" --prompt "Explain this architecture"
```
Ingest a document into the local knowledge base:
```bash
python knowledge.py --ingest "path/to/document.pdf"
```
---
## Release & Local Distribution
3rd-Route is designed as a **local application** distributed as release archives (`.zip`, `.tar.gz`). Users download the release archive, extract it locally, configure their keys, and run it on their own machines.
### Release Installation Flow
1. **Download & Extract** the latest release archive (`3rd-Route-v1.0.0.zip`) from GitHub Releases.
2. **Create and activate the Python virtual environment**:
- PowerShell:
```powershell
python -m venv .venv
.venv\Scripts\activate
```
- Bash (Linux/macOS):
```bash
python3 -m venv .venv
source .venv/bin/activate
```
3. **Install Python backend dependencies**:
```bash
pip install -r requirements.txt
```
4. **Configure backend environment variables**:
```bash
cp .env.example .env
```
Provide your `OPENROUTER_API_KEY` and `OLLAMA_API_KEY`.
5. **Install and configure frontend**:
```bash
cd frontend
npm install
cp .env.example .env.local
```
Configure `VITE_API_BASE_URL=http://localhost:8000` and Auth0 keys (`VITE_AUTH0_DOMAIN`, `VITE_AUTH0_CLIENT_ID`).
6. **Start the application**:
- Terminal 1: `python server.py`
- Terminal 2: `cd frontend && npm run dev`
7. Open `http://localhost:5173` in your web browser.
---
## Project Structure
- `frontend/`: React + Vite + TypeScript web interface ("3rd-Route").
- `server.py`: Local FastAPI bridge connecting the frontend to the MMAR pipeline.
- `modelrouter.py`: Central orchestrator and task router.
- `vision.py`: Image analysis and OCR pipeline.
- `reasoning.py`: Web research, document RAG, and problem synthesis.
- `coding.py`: Automated code generation.
- `knowledge.py`: Document ingestion, chunking, and SQLite storage.
- `llm.py`: Shared transport for OpenRouter calls.
- `config.py`: Centralized configurat# MMAR - Multi-Modal Agentic Router
A Multi-Modal Agentic Rout that routes and processes tasks across vision analysis, knowledge base retrieval, web-augmented reasoning, and code generation.
---
## 🏆 Hackathon Tracks
We have used the **Auth0 track** and **.xyz track**:
- **Auth0 Track**: Integrated Auth0 for secure user authentication, Universal Login, session management, and account-isolated chat sessions and knowledge base storage.
- **.xyz Track**: Leveraged the `.xyz` domain track for hosting and public web deployment of the 3rd-Route workbench platform.
---
## Pipeline Architecture
- Vision Stage: Analyzes images, diagrams, and error screenshots with a free OpenRouter vision model.
- Reasoning Stage: Performs local RAG on ingested documents and live web search via OpenRouter to produce structured technical specifications.
- Coding Stage: Implements working solutions from specifications using Ollama Cloud.
- Router: Automatically determines task requirements and coordinates stage execution.
## Prerequisites
- Python 3.10 or higher
- Tesseract OCR (required for OCR and image text extraction)
- Ubuntu/Debian: `sudo apt-get install tesseract-ocr`
- macOS: `brew install tesseract`
- Windows: Install via the official installer and add the installation folder to your PATH.
## Setup
1. Clone the repository:
```bash
git clone <repository-url>
cd MMAR
```
2. Create and activate a virtual environment:
```bash
python -m venv .venv
```
- On Windows:
```powershell
.venv\Scripts\activate
```
- On Linux/macOS:
```bash
source .venv/bin/activate
```
3. Install dependencies:
```bash
pip install -r requirements.txt
```
4. Configure environment variables:
Copy the example environment file:
```bash
cp .env.example .env
```
Open `.env` and provide your API keys:
- `OPENROUTER_API_KEY`: OpenRouter API key
- `OPENROUTER_API_KEY_ALT`: Optional alternate OpenRouter key
- `OLLAMA_API_KEY`: Ollama Cloud API key
## Usage
### 1. Web Frontend Mode (3rd-Route)
3rd-Route provides a modern React-based UI inspired by clean, minimalist desktop AI workbenches, with Auth0 authentication and multi-stage pipeline controls.
1. **Start the local API backend server**:
- On Windows (PowerShell):
```powershell
python server.py
```
- On Linux/macOS:
```bash
python3 server.py
```
The backend API listens on `http://localhost:8000`.
2. **Start the React frontend**:
- In a separate terminal:
```bash
cd frontend
npm install
npm run dev
```
Open `http://localhost:5173` in your browser.
---
### 2. Interactive Terminal Mode
Run the router interactively:
```bash
python modelrouter.py
```
### 3. CLI Mode
Submit a text query directly:
```bash
python modelrouter.py --text "Explain how vector databases work."
```
Submit an image with an optional prompt:
```bash
python modelrouter.py --image "path/to/diagram.png" --prompt "Explain this architecture"
```
Ingest a document into the local knowledge base:
```bash
python knowledge.py --ingest "path/to/document.pdf"
```
---
## Release & Local Distribution
3rd-Route is designed as a **local application** distributed as release archives (`.zip`, `.tar.gz`). Users download the release archive, extract it locally, configure their keys, and run it on their own machines.
### Release Installation Flow
1. **Download & Extract** the latest release archive (`3rd-Route-v1.0.0.zip`) from GitHub Releases.
2.**Release version**- https://github.com/ranitpal77/3rd-Route/releases/tag/version
3. **Create and activate the Python virtual environment**:
- PowerShell:
```powershell
python -m venv .venv
.venv\Scripts\activate
```
- Bash (Linux/macOS):
```bash
python3 -m venv .venv
source .venv/bin/activate
```
4. **Install Python backend dependencies**:
```bash
pip install -r requirements.txt
```
5. **Configure backend environment variables**:
```bash
cp .env.example .env
```
Provide your `OPENROUTER_API_KEY` and `OLLAMA_API_KEY`.
6. **Install and configure frontend**:
```bash
cd frontend
npm install
cp .env.example .env.local
```
Configure `VITE_API_BASE_URL=http://localhost:8000` and Auth0 keys (`VITE_AUTH0_DOMAIN`, `VITE_AUTH0_CLIENT_ID`).
67 **Start the application**:
- Terminal 1: `python server.py`
- Terminal 2: `cd frontend && npm run dev`
7. Open `http://localhost:5173` in your web browser.
---
## Project Structure
- `frontend/`: React + Vite + TypeScript web interface ("3rd-Route").
- `server.py`: Local FastAPI bridge connecting the frontend to the MMAR pipeline.
- `modelrouter.py`: Central orchestrator and task router.
- `vision.py`: Image analysis and OCR pipeline.
- `reasoning.py`: Web research, document RAG, and problem synthesis.
- `coding.py`: Automated code generation.
- `knowledge.py`: Document ingestion, chunking, and SQLite storage.
- `llm.py`: Shared transport for OpenRouter calls.
- `config.py`: Centralized configurat